In this guide, we will show you the steps to install the TWRP Recovery on your Samsung Galaxy Note 9 device. Back in the day, the Note series had quite a massive fan following. Thanks to its phablet-like experience, a large screen with S Pen, and an impressive specs sheet, these devices were quite popular in their own rights. So much so that it ended up taking a fair share of userbase from the Samsung’s S series lineup. And so, the writing was on the walls that the Note series would soon see the back door.
While that has now indeed happened, there is still no taking away any limelight from the fact that they were and are still among the most popular devices in custom development. It has even recently been blessed with the latest One UI 4.1 Android 12 update, courtesy of a custom ROM. And that’s not it. There exists a slew of customized firmware, modules, and tweaks that you could flash onto your device. But to carry out his flashing process, you will have to install the TWRP Recovery on your Galaxy Note 9. And in this guide, we will show you how to do just that. Follow along.
Table of Contents
How to Install TWRP Recovery on Samsung Galaxy Note 9

The below instructions are listed under separate sections for ease of understanding. Make sure to follow the same sequence as mentioned. Droidwin and its members wouldn’t be held responsible in case of a thermonuclear war, your alarm doesn’t wake you up, or if anything happens to your device and data by performing the below steps.
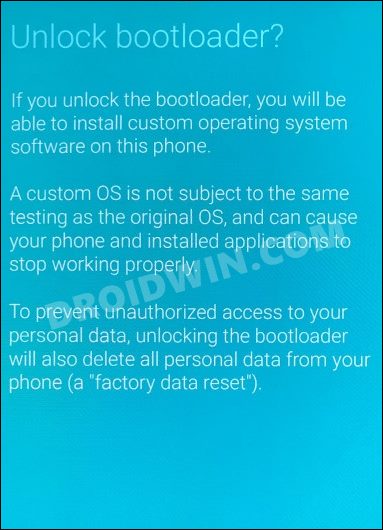
STEP 1: Unlock Bootloader on Galaxy Note 9
First and foremost, you will have to unlock the bootloader on your device. Do note that doing so will wipe off all the data from your device and could nullify its warranty as well. So if that’s well and good, then refer to our guide on How to Unlock Bootloader on Samsung Galaxy Note 9
STEP 2: Download TWRP for Galaxy Note 9
Next up, download the official TWRP TAR and IMG file for your device from below. The TAR file will be flashed via Odin whereas the IMG will be flashed via TWRP itself. All this has been explained in the subsequent sections.
- TWRP for Galaxy Note 9 (Exynos): Download TAR File
- TWRP for Galaxy Note 9 (Exynos): Download IMG File
After that, also download the No Verity ZIP file. This will be used to disable data partition encryption. Once downloaded, transfer this No Verity ZIP as well as TWRP IMG file to your device, whereas leave the TWRP TAR file on your PC itself.
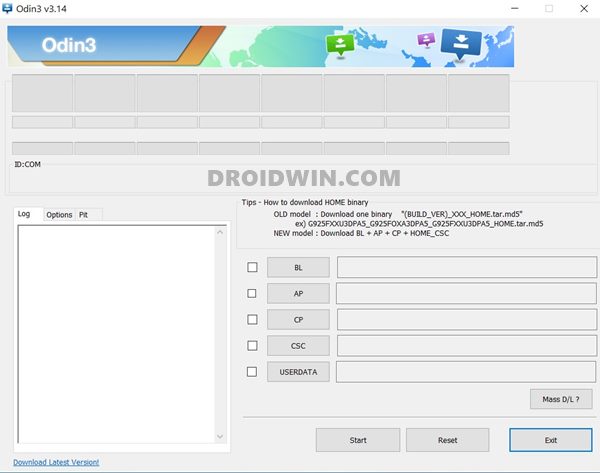
STEP 3: Download Odin
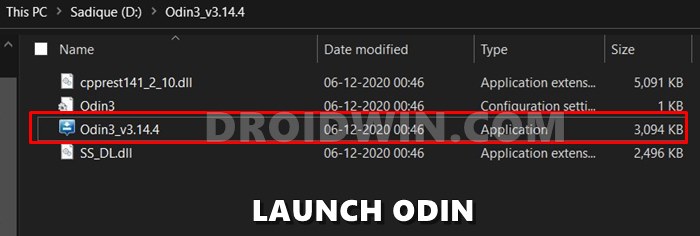
After that, you will have to get hold of Odin so as to flash the TWRP TAR file to your Galaxy Note 9 device. So download it and then extract it to any convenient location on your PC.
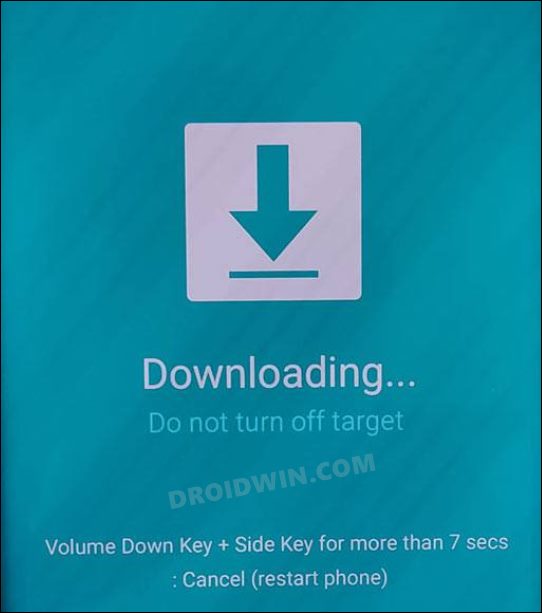
STEP 4: Boot Galaxy Note 9 Download Mode
- To begin with, power off your device.
- Then press and hold Vol Down + Bixby + Power keys together for 15 seconds.

- As soon as you see the Warning message on your device, release the pressed keys.
- Finally, press the Volume Up key once and your device will be booted to Download Mode.
STEP 5: Flash TWRP on Galaxy Note 9
- Double click on the Odin3_v3.14.4.exe file to launch the tool.
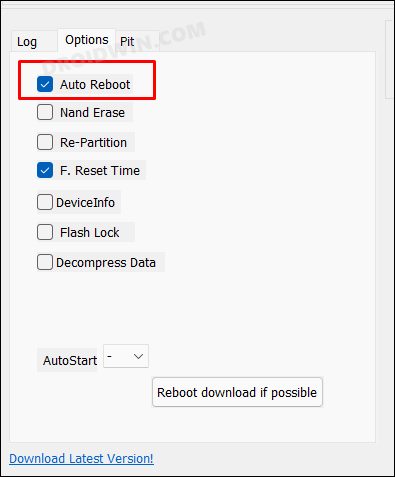
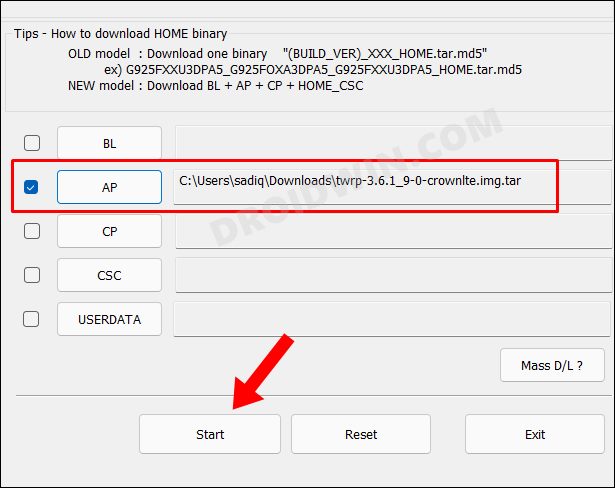
- Then go to the Options tab and uncheck Auto-Reboot.
- After that, click on AP and load the TWRP TAR file for your device.
- Now click Start in Odin. The flashing will begin. Once done, you will get the Pass message in Odin.
- Unplug your device from the PC. Now press and hold the Bixby + Volume Down + Power keys together until the Download Mode disappears.
- When that happens, you will see a black screen. At that point, immediately release the Volume Down button and press the Bixby key + Volume Up + Power buttons for 10 to 15 seconds to forcefully enter TWRP.

STEP 6: Initialize TWRP on Galaxy Note 9
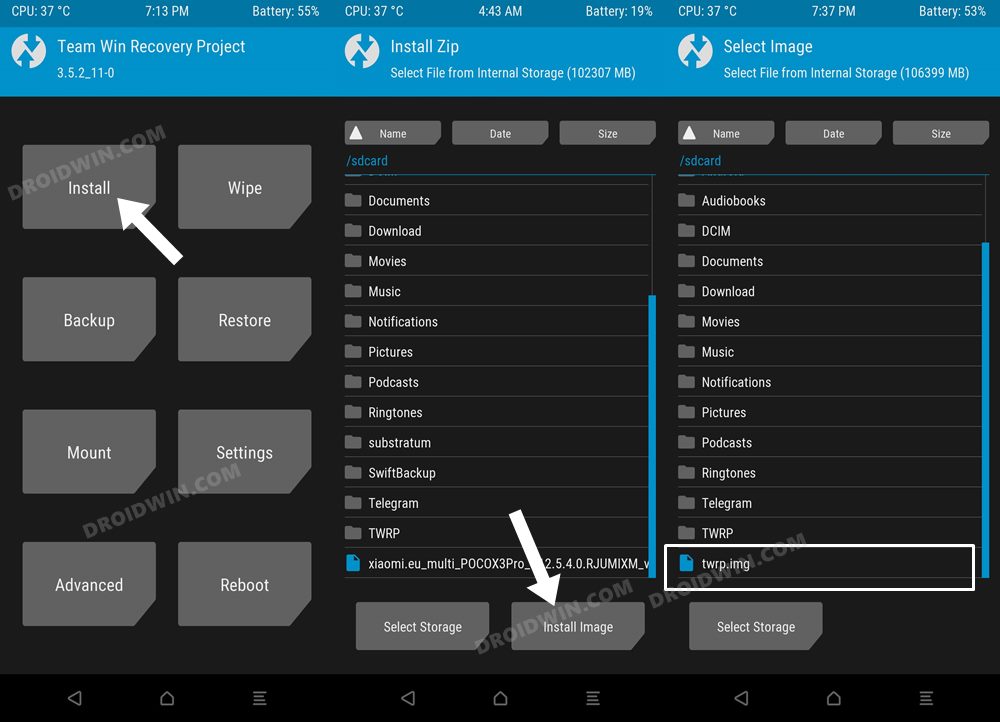
- From the TWRP home screen, go to Install.
- Then tap on the Install Image button situated at the bottom.
- Now select the TWRP.img file and perform a right swipe to flash it.
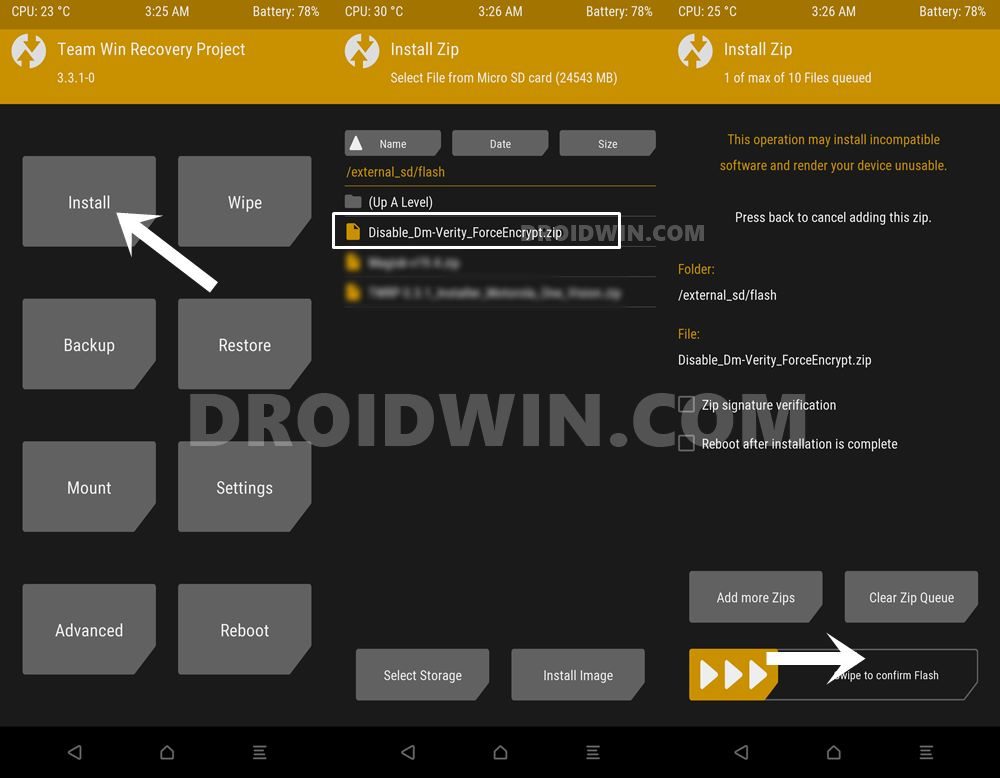
- Once done, go to Install and tap on the Install ZIP button.
- Select the no-verity-opt-encrypt-6.1 zip file and perform a right swipe to flash it.
- That’s it. You may reboot the device to the OS via Reboot > System.
These were the steps to install the TWRP Recovery onto your Galaxy Note 9 device. If you have any queries concerning the aforementioned steps, do let us know in the comments. We will get back to you with a solution at the earliest.


Siegfried
Wenn ich alles so gemacht habe, Starte ich dann Note9 von TWRP aus oder erst Ausschalten und dann starten.
Bleibt am Handy alles erhalten und kann anschließend ein TWRP Backup, das auch startet, gemacht werden.
Gr. S G.
Maurits
Hi Sadique,
In STEP 6 nr 3. you state “Now select the TWRP.img file and perform a right swipe to flash it.” But before you can swipe you have to make a selection between:
Boot, Recovery, System Image, Vendor Image or ODM Image. Which one should it be?
Kind regards,
Maurits