In this guide, we will show you the steps to root your OnePlus device running ColorOS 12 Android 12 via Magisk. There are quite a few OEMs out there that are running their own customized OS skin. From OneUI to MIUI, from RealmeUI to EMUI, the list is quite a long one. However, it was the offering from OnePlus that managed to rise above them all.
Managing to maintain a perfect equilibrium between the required feature sets, the customization and tweaks, and the overall device stability, there wasn’t much left to ask. But why are we phrasing all this in the past tense? Well, it’s due to the OEM’s decision to discontinue the use of its own OxygenOS and rather adopt one of the parent company’s other subsidiary’s UI.
Much to the disappointment of literally everyone, OnePlus has now decided to jump over the ships to Oppo’s ColorOS. And we, as a user, don’t have any say in this. Since this is now going to be the route forward, let’s get accustomed to it, both in the general use case as well as in custom development. And as of now, we will be focusing on the latter domain. In this guide, we will show you the steps to root your OnePlus device running ColorOS 12 Android 12 via Magisk.
Table of Contents
Root OnePlus Android 12: Fastboot Boot vs Fastboot Flash

Before we list out the steps, there’s an important point worth discussing. There exist two different methods through which you could root your device- either by first booting the magisk patched boot to obtain temporary root and then using the Magisk Direct Install to permanent root OR by directly flashing the magisk patched boot.img. It is always recommended that you opt for the former approach [temporary root].
This is because in case something goes wrong [say, you have used an incorrect boot.img file] and you had done temporary root, then simply restarting your device would replace the patched boot with stock boot and this will fix the bootloop issue within seconds. On the other hand, if you had permanently rooted and something went wrong, then upon restating, it will still have the corrupt patched boot [since you had permanently installed it].
So you will then have to manually flash the stock boot.img or in some cases, the entire payload.bin via Fastboot Commands. Apart from that, temporary root has many other benefits. For example, if you need to test a module for just a one-time usage, then you could temporarily create a rooted environment, try out that mod, and then restart your device to remove the root!
Owing to all these benefits, this guide will show you the steps to root your OnePlus running ColorOS 12 Android 12 via Magisk temporary boot method [and then permanent root via Direct Install].
How to Root OnePlus ColorOS 12 Android 12 via Magisk
The below instructions are listed under separate sections for ease of understanding. Make sure to follow in the exact same sequence as mentioned. Droidwin and its members wouldn’t be held responsible in case of a thermonuclear war, your alarm doesn’t wake you up, or if anything happens to your device and data by performing the below steps. NOTE: These steps are for ColorOS 12 and shouldn’t be carried out on OxygenOS 12.
STEP 1: Install Android SDK

First and foremost, you will have to install the Android SDK Platform Tools on your PC. This is the official ADB and Fastboot binary provided by Google and is the only recommended one. So download it and then extract it to any convenient location on your PC. Doing so will give you the platform-tools folder, which will be used throughout this guide to root your OnePlus device running ColorOS 12 Android 12 via Magisk.
STEP 2: Enable USB Debugging and OEM Unlocking
Next up, you will also have to enable USB Debugging and OEM Unlocking on your device. The former will make your device recognizable by the PC in ADB mode. This will then allow you to boot your device to Fastboot Mode. On the other hand, OEM Unlocking is required to carry out the bootloader unlocking process.
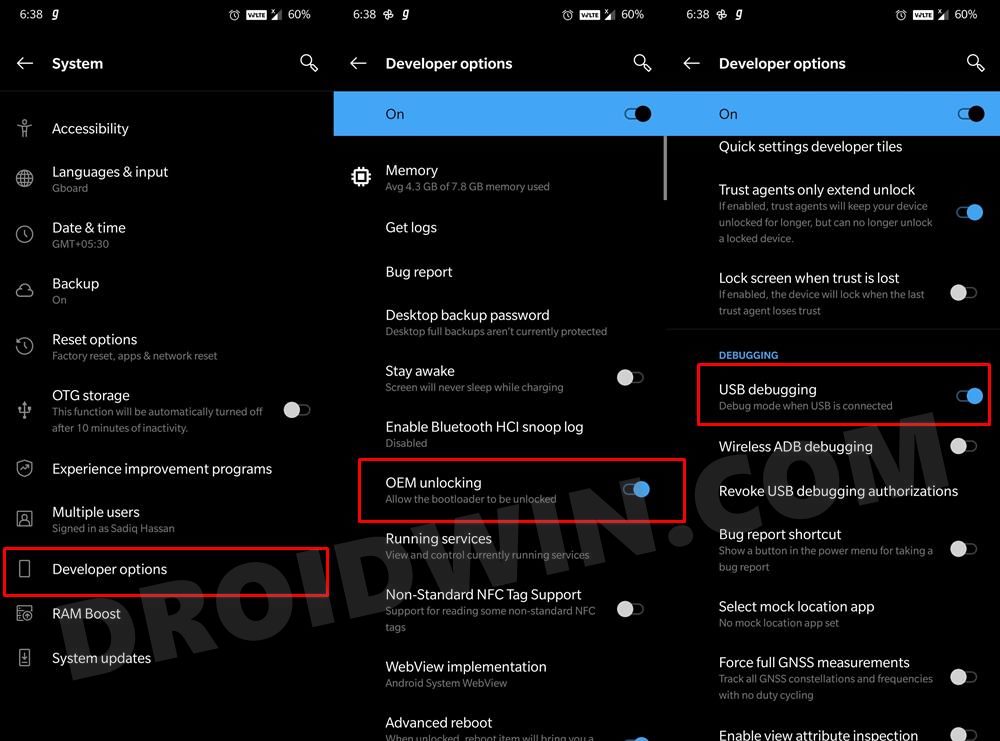
So head over to Settings > About Phone > Tap on Build Number 7 times > Go back to Settings > System > Advanced > Developer Options > Enable USB Debugging and OEM Unlocking.
STEP 3: Unlock Bootloader
Next up, you will also have to unlock the device’s bootloader. Do keep in mind that doing so will wipe off all the data from your device and could nullify its warranty as well. So if that’s all well and good, then please refer to our detailed guide on How to Unlock the Bootloader on the OnePlus 10 Pro [Video].
STEP 4: Download Stock Firmware
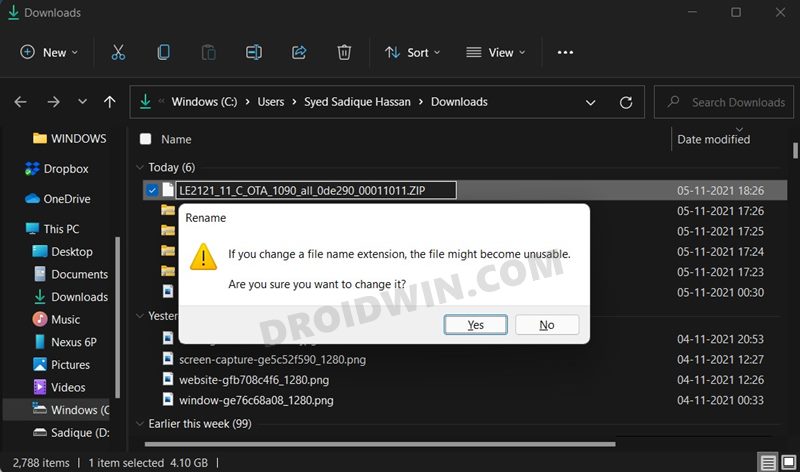
- Now download the stock firmware for your device from the below link
- If the downloaded firmware is in JAR, then change its extension to ZIP (right-click > Rename).

STEP 5: Extract OnePlus ColorOS payload.bin
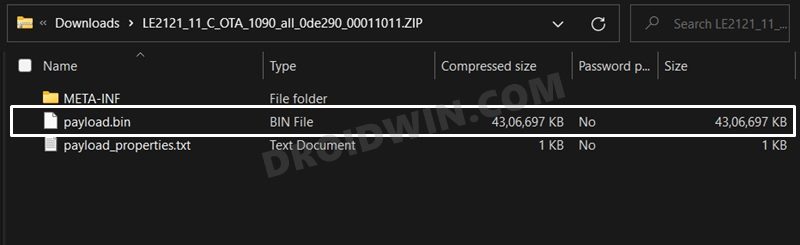
- Once you have changed the extension from JAR to ZIP, extract it to any convenient location on your PC.
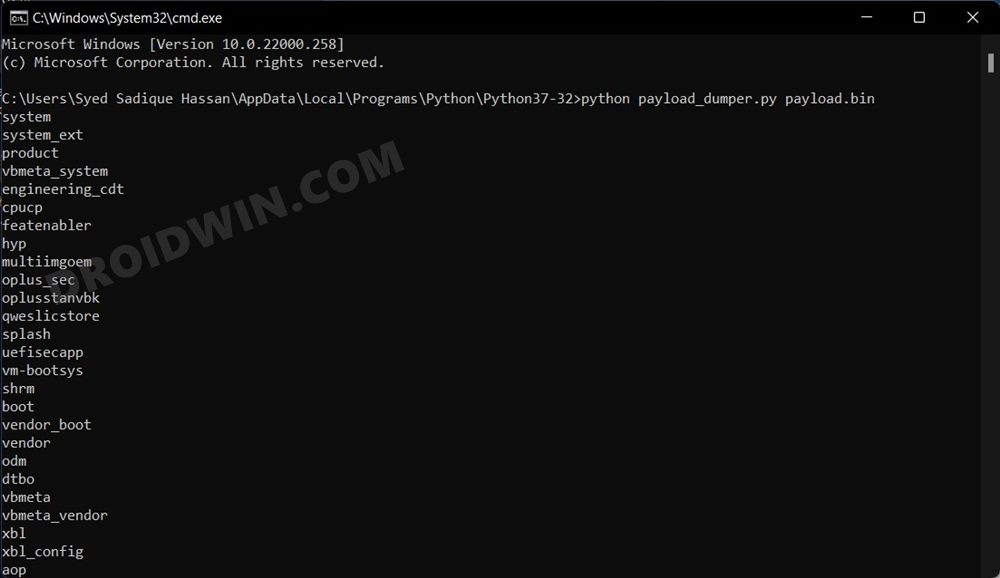
- Doing so shall give you a couple of files, including the payload.bin file which will be used to root your OnePlus device running ColorOS 12 Android 12 via Magisk.
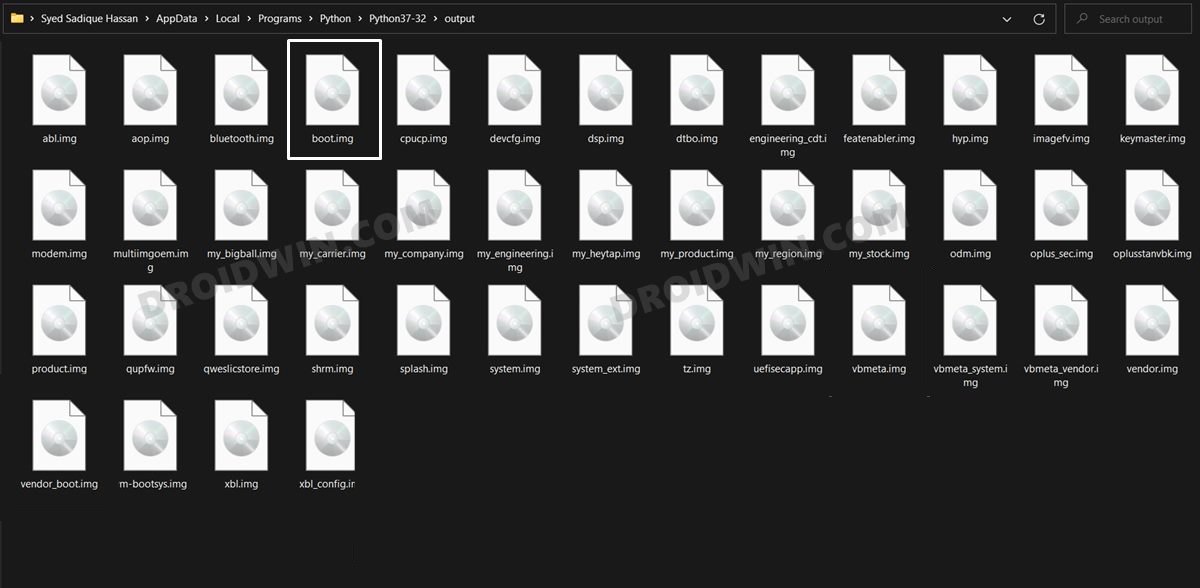
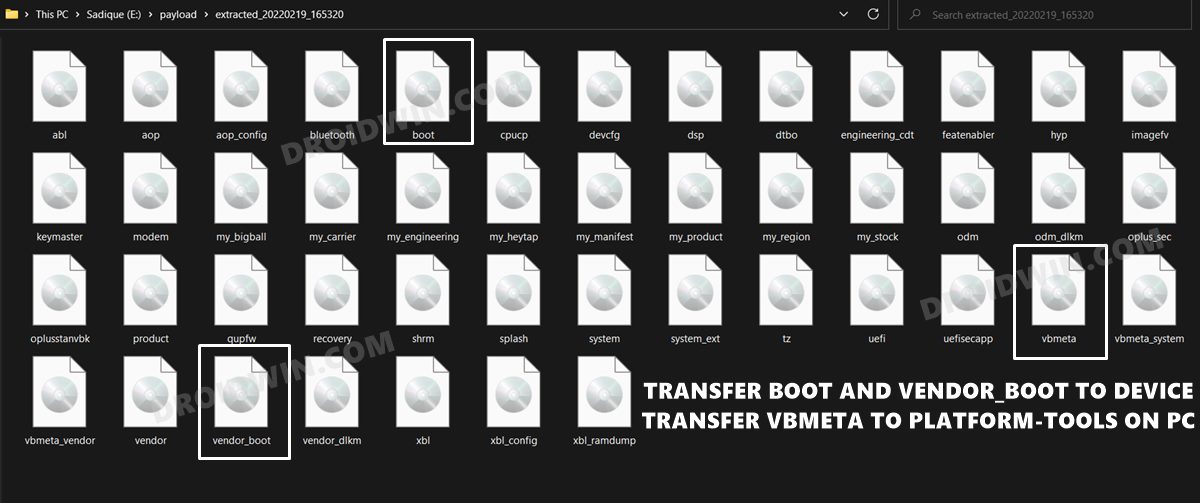
- So extract this payload.bin file to get the boot and vendor_boot files. For that, you mayrefer to our guide on How to Extract payload.bin and get stock firmware image files.
- Once the extraction is complete, copy the boot.img and vendor_boot.img files from there and transfer them to your device.
- Likewise, transfer the vbmeta.img file to the platform-tools folder on your PC. Now move over to the next step to root your OnePlus device running ColorOS 12 Android 12 via Magisk.
STEP 6: Patch Boot via Magisk
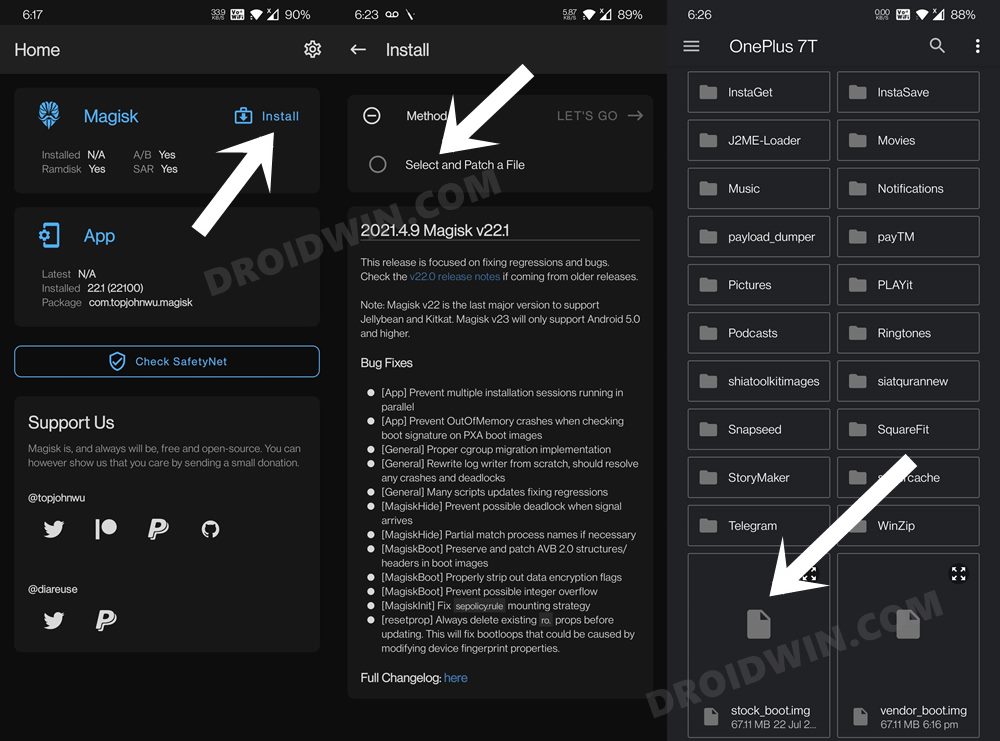
- To begin with, download and install the Magisk App onto your device.
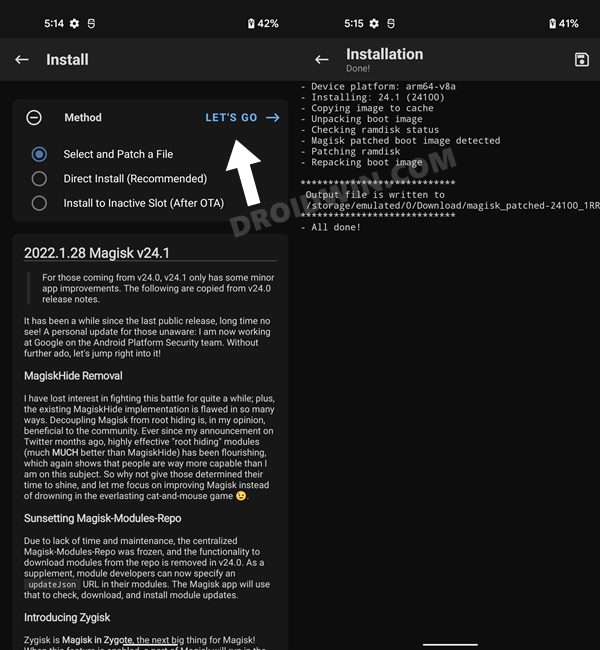
- Then launch it, tap on the button Install next to Magisk, and choose Select and Patch a File.
- Now navigate to the boot.img file, select it, and tap on the Let’s Go button situated at the top right.
- The patching process will now begin and will take a few seconds.
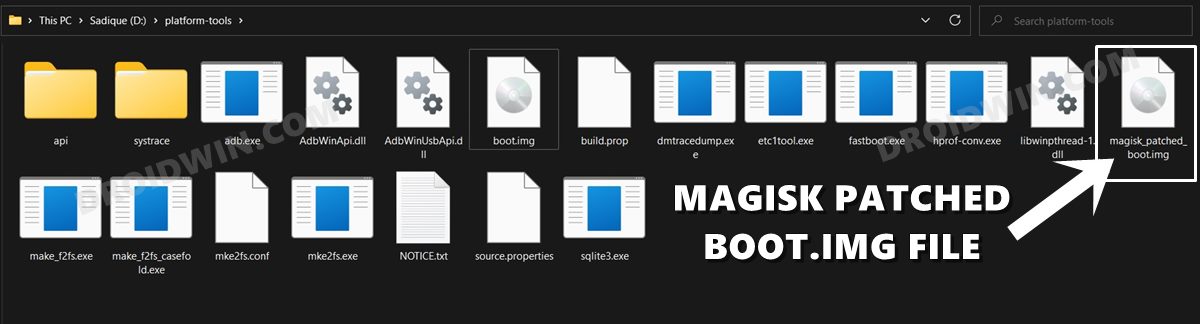
- The boot.img file will now be patched and placed under the Downloads folder on your device. You should transfer this file to the platform-tools folder on your PC. We will now be using this file to root your Pixel 6 device.

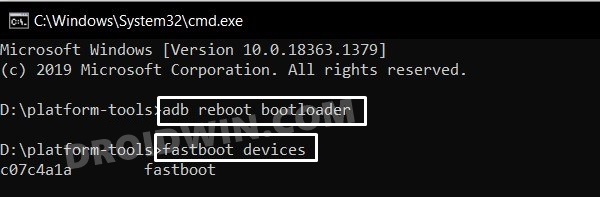
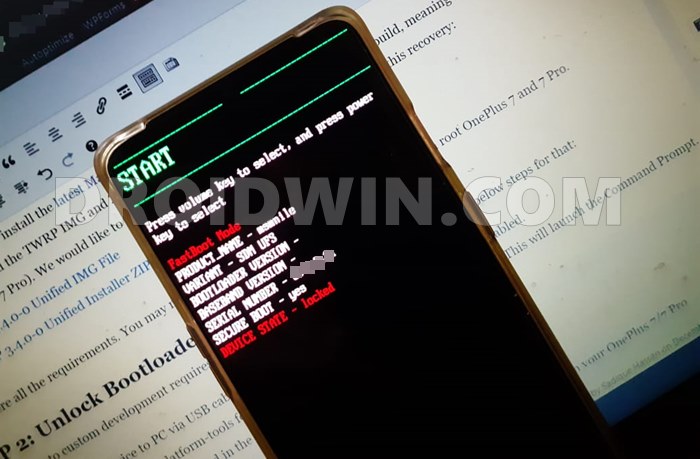
STEP 7: Boot OnePlus to Fastboot Mode
- Connect your device to the PC via USB cable. Make sure USB Debugging is enabled.
- Then head over to the platform-tools folder, type in CMD in the address bar, and hit Enter. This will launch the Command Prompt.
- Type in the following command in the CMD window to boot your device to Fastboot Mode
adb reboot bootloader
- To verify the Fastboot connection, type in the below command and you should get back the device ID.
fastboot devices

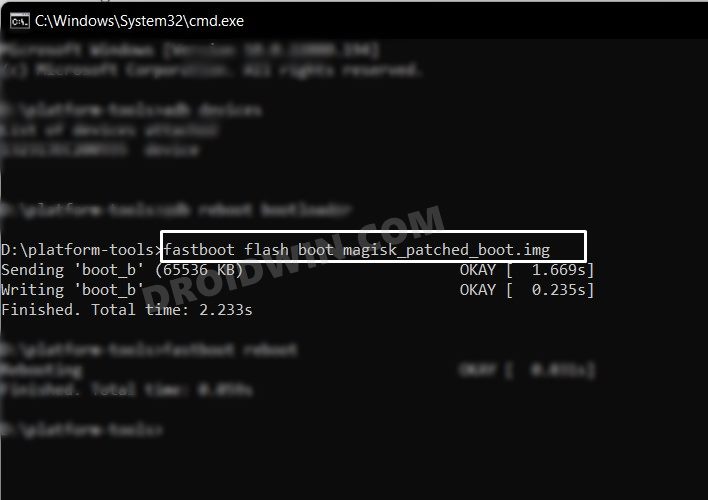
STEP 8: Flash Patched Boot & Root OnePlus ColorOS 12 Android 12
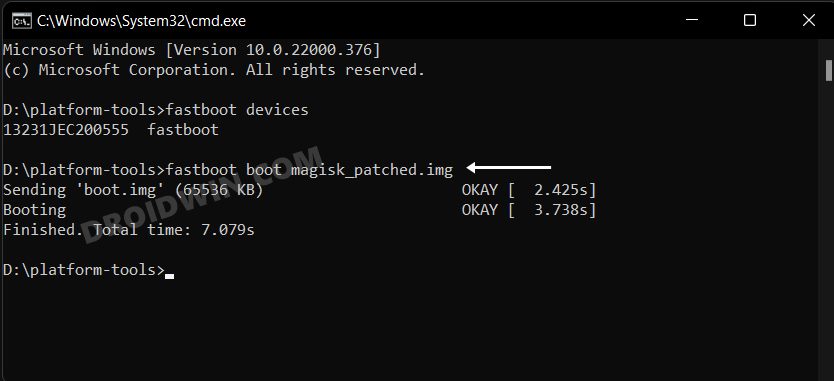
- To begin with, execute the below command to boot your device via Magisk patched boot.img
fastboot boot magisk_boot.img
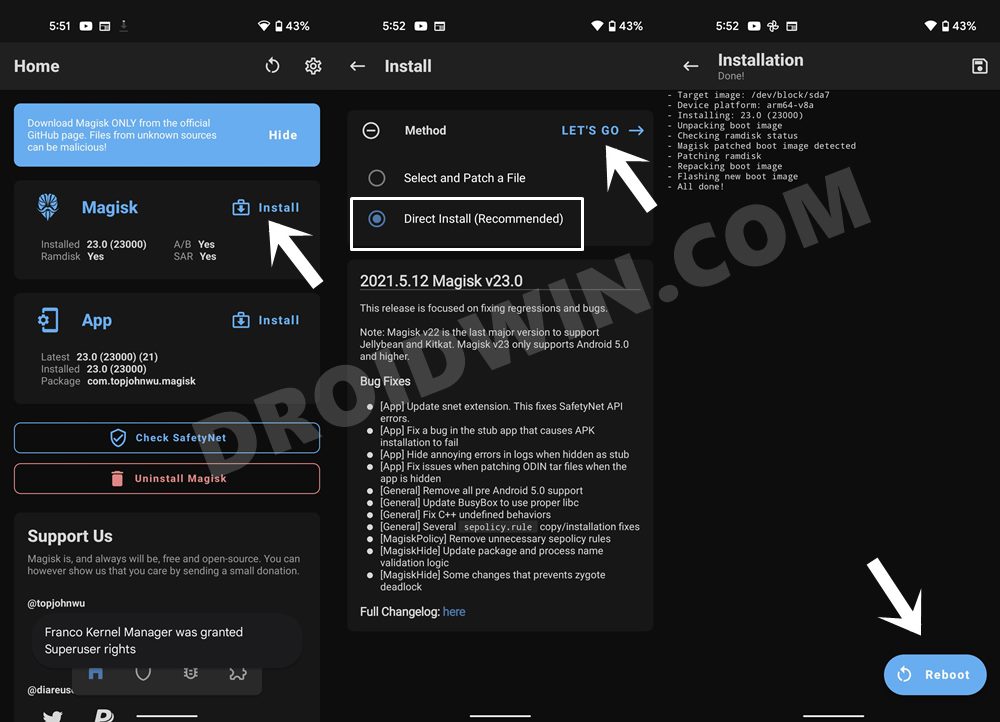
- Once your device is booted to the OS, launch the Magisk App.
- Then tap on Install > Direct Install and tap Let’s Go situated at the top-right.
- Once done, hit the Reboot button situated at the bottom right.
- That’s it, your device will now boot to the permanently rooted OS.
So with this, we round off the guide on how you could root your OnePlus device running ColorOS 12 Android 12 via Magisk. If you have any queries concerning the aforementioned steps, do let us know in the comments section. We will get back to you with a solution at the earliest.
FAQ: Root OnePlus via Patched Vendor_Boot
If you are unable to root your device after flashing the Magisk patched boot, then consider patching and flashing patched vendor_boot and stock vbmeta as well. Here’s how it could be done:
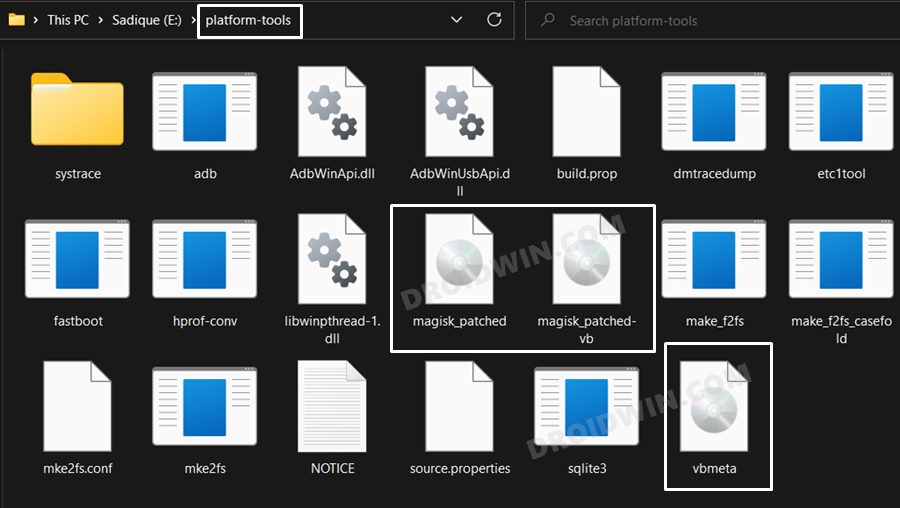
- To begin with, transfer the vbmeta.img from the extracted payload.bin to the platform-tools folder.
- Next up, transfer the vendor_boot file from the payload.bin over to your device.
- Then launch the Magisk App and tap on install next to Magisk.
- Choose ‘Select and Patch a File’, navigate to the stock vendor_boot.img file, and select it.
- Then tap on the Let’s Go button situated at the top-right. The file will now be patched.
- Once done, it will be placed in the Downloads folder. Transfer it to the platform-tools folder on your PC.
- So make sure that the patched boot, patched vendor_boot, and the stock vbmeta.img files are present inside the platform-tools folder.
- Then rename the patched boot file to magisk_patched.img and patched vendor_boot to magisk_patched-vb.img.
- Next up, boot your device to the Fastboot Mode using the below command:
adb reboot bootloader
- Now open the CMD window inside this platform-tools folder and type in the below command to disable verity by flashing vbmeta:
fastboot --disable-verity --disable-verification flash vbmeta vbmeta.img
- Next up, execute the below command to flash the patched vendor_boot:
fastboot flash vendor_boot magisk_patched-vb.img
- After that, boot your device using the patched boot.img file:
fastboot boot magisk_patched.img
- Now launch the Magisk app and tap on the Install button next to Magisk.
- Then select Automatic Installation (or Direct Installation) and wait for the process to complete.
- Once done, tap on the Reboot button that appears at the bottom right. Your device will now boot to the rooted OS
- That’s it. These were the steps to root your OnePlus device via Magisk patched boot, vendor_boot, and stock vbmeta.


Papon
Can i use this method oneplus Oxygen os Latest update , Android 12 c.16 for op8.
José
Hi, is this still valid now that OnePlus has decided against moving to Color OS? I have updated my OnePlus with Oxygen OS 12 and would like to root it. Please let me know!
Sadique Hassan
Hi Jose, the steps will be even simpler in that case. You might not even have to patch and flash vendor_boot and disable verity. But before trying it out, please let me know your device name and the complete OS version number so that I could reverify this.
Jose
Hi Sadique, thanks for your prompt response!
My device is OnePlus 8T and the complete update is KB2001_11_C.11 (even though it says 11 it is definitely Android 12).
Thanks in advance for your response!
Benny
Hello. Thank you for your guide. I have a OnePlus 8 with ColorOS 12. I tried following your instruction and extracted payload.bin however there is no vendor_boot.Img. Only boot.img.. Can I just go ahead and patch boot.img only?