In this guide, we will show you the steps to root any Spreadtrum device via Magisk patched boot.img file. Spreadtrum devices, though not as popular as Snapdragon or MediaTek, still powers quite a few smartphones across the globe. And while you wouldn’t count in among the most active players in custom development, yet it still manages to perform quite decently.
There are already quite a few custom binaries doing the rounds for this set of devices. After you qualify the sole requirement in the form of bootloader unlocking, you stand a chance to try out a plethora of modifications. From installing a custom recovery such as TWRP to gaining administrative rights of your device, the possibilities stand endless. As far as this guide goes, our focus will be on rooting your device. So how will this process of rooting your Spreadtrum device via Magisk patched boot.img file be carried out?
To begin with, we will download the stock firmware for your device. Then it will be extracted via SPD Flash Tool which will give us the stock boot.img file. This file will then be patched via the Magisk App and then flashed onto your device via Fastboot Commands. That’s it, your device stands rooted. So on that note, let’s start off with the guide.
Table of Contents
How to Root Spreadtrum Devices via Magisk Patched boot.img
The entire instructions are listed under separate sections for ease of understanding. Make sure to follow in the exact same sequence as mentioned below. Droidwin and its members wouldn’t be held responsible in case of a thermonuclear war, your alarm doesn’t wake you up, or if anything happens to your device and data by performing the below steps.
STEP 1: Enable USB Debugging and OEM Unlocking
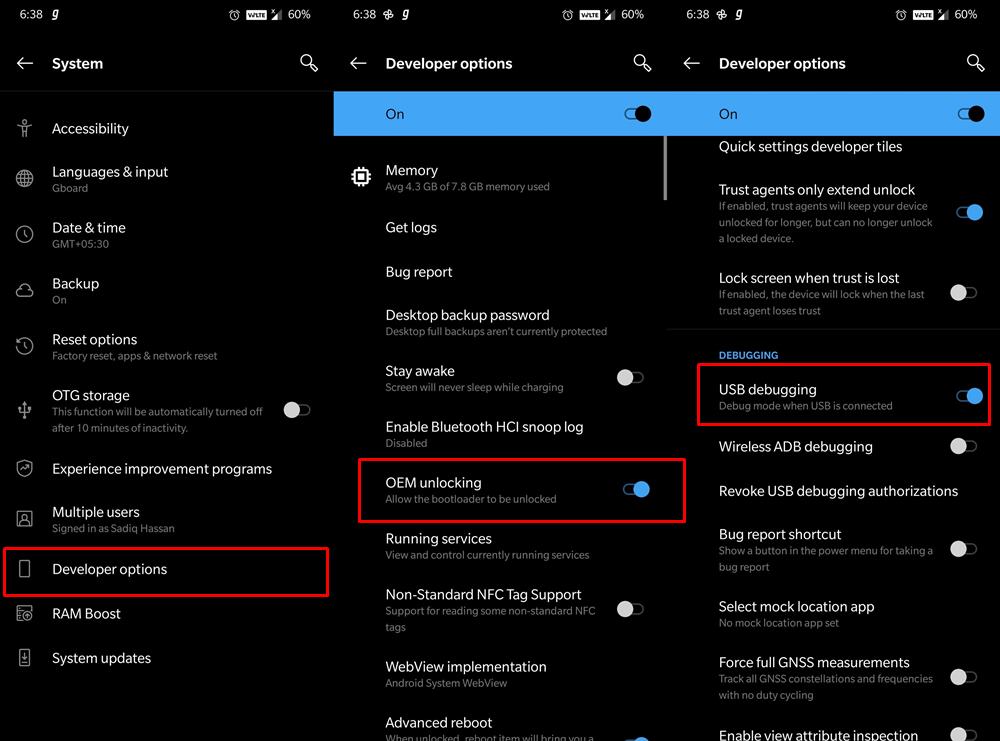
First and foremost, enable USB Debugging and OEM Unlocking on your device. Debugging is required to make your device recognizable by the PC in ADB mode, which in turn will boot your device to Fastboot Mode. On the other hand, OEM Unlocking is required to carry out the bootloader unlocking process. So head over to Settings > About Phone > Tap on Build Number 7 times (MIUI Number on Xiaomi devices) > Go back to Settings > System > Developer Options > Enable USB Debugging and OEM Unlocking.
STEP 2: Unlock Spreadtrum Device Bootloader
It goes without saying that you will have to unlock the device’s bootloader as well. But before you proceed to do so, keep in mind that this process will wipe off all the data on your device. Likewise, it might make the device’s warranty null and void. If that’s well and good, then you may refer to our device-specific guides in this regard:
- How to Unlock Bootloader on any Sony Xperia Device
- How to Unlock Bootloader on any Samsung Device [New VaultKeeper Method]
- A Universal Guide to Unlock Bootloader on any Realme Device
- How to Unlock Bootloader on any Motorola Device
- Unlock Bootloader on any Realme Device
- How To Unlock Bootloader on OnePlus devices
STEP 3: Install Android SDK
Download the latest Android SDK Platform Tools on your PC. This is the official ADB and Fastboot binaries provided by Google and you should always use this only (not only other third-party tools). So download and then extract it to any convenient location on your PC. This shall give you the platform-tools folder. We will now be using this directory throughout the guide to root your Spreadtrum device via Magisk patched boot.img file.
STEP 4: Extract boot.img from Spreadtrum PAC Firmware
First off, download the stock firmware corresponding to your device’s build number. Make sure that the firmware that you are downloading is the same that is currently installed on your device. As far as the download source is concerned, there isn’t any official site as such. You will have to Google it and find it for your device.
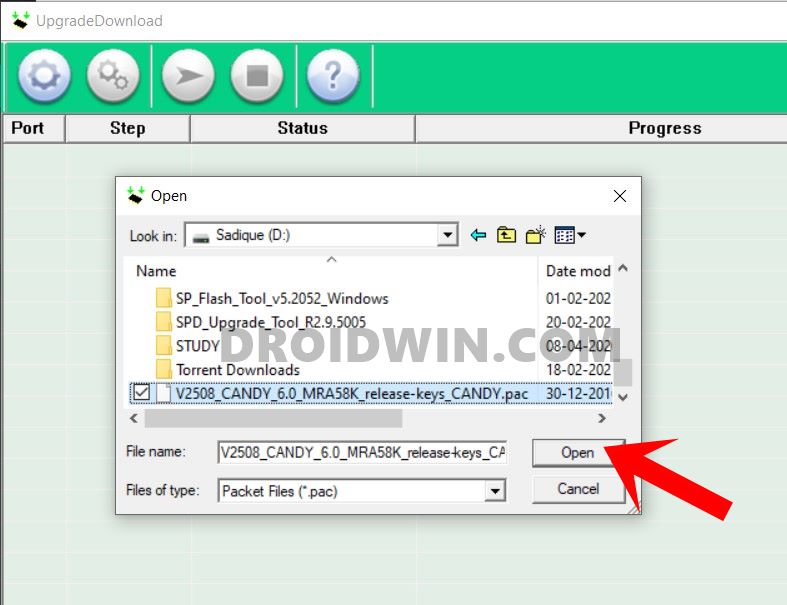
Once downloaded, the firmware file will be in PAC format. So refer to our detailed guide on How to Extract Spreadtrum and Unisoc PAC Firmware File. Once extracted, you will get a few partition files, including the boot.img. And in this guide, we will be using this boot.img file to root your Spreadtrum device via Magisk patched boot.img file.
STEP 5: Install Magisk App on Spreadtrum Device
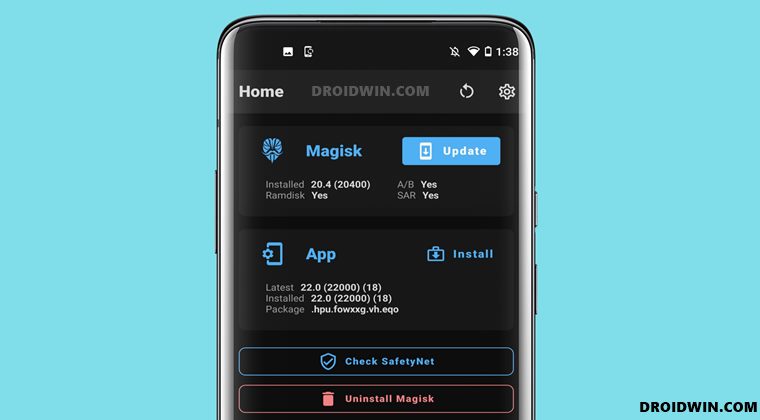
Now install the latest Magisk App onto your device. As per the latest Magisk V22, the Magisk Manager APK and Magisk ZIP Installer have been bundled into a single package known as the Magisk App. So download and install it onto your device.
STEP 6: Patch Spreadtrum boot.img via Magisk
- You will now have to patch this stock boot.img file via Magisk. To do so, transfer this file to your device.
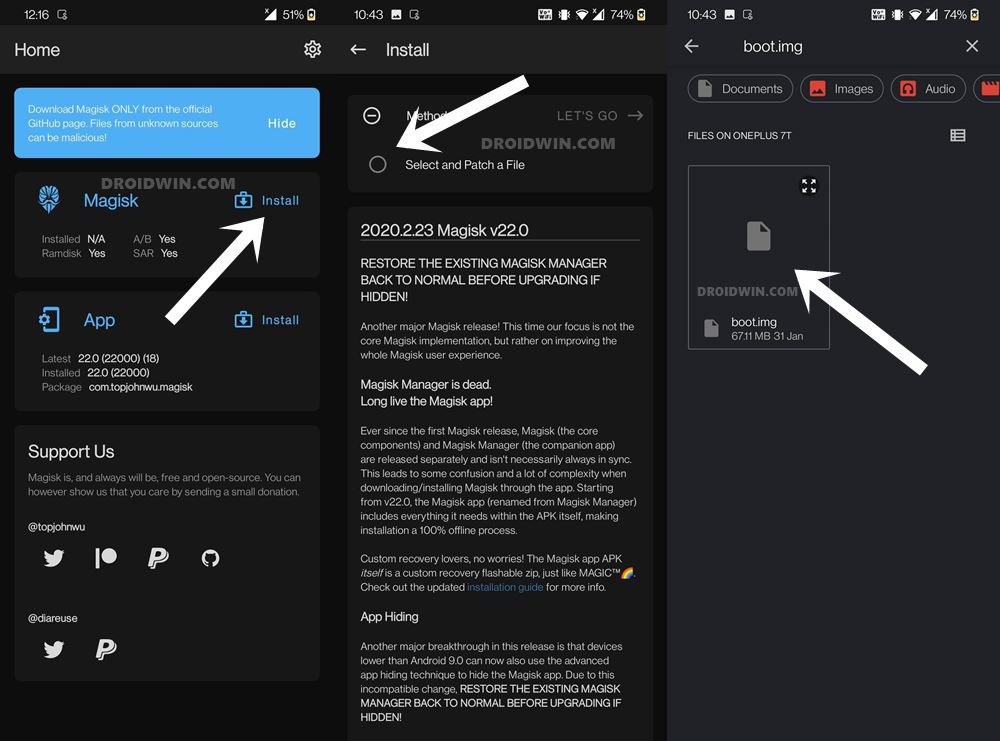
- Now launch the Magisk App and tap on Install next to Magisk.
- Next up, choose Select and Patch a File.

- Browse to the stock boot.img file and select it.
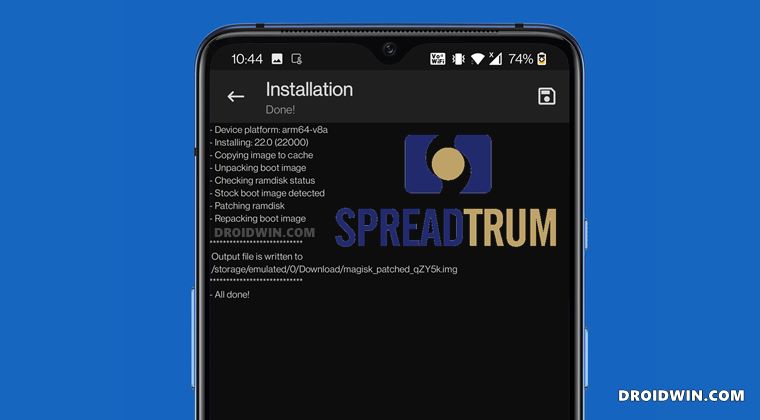
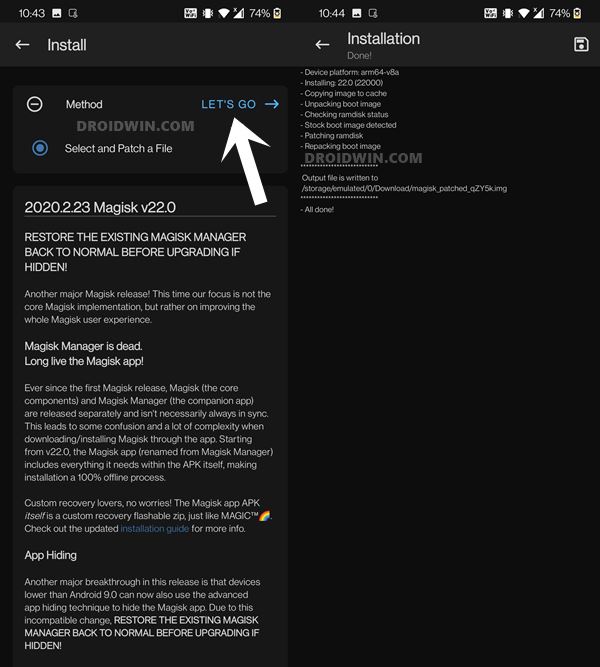
- Then press the Let’s Go button situated at the top right. Magisk will now start patching the file.
- Once done, you should get the magisk_patched_[random-numbers].img file placed inside the Downloads folder.
Rename and remove the underscore and random number from the end of the file, so that the complete name becomes magisk_patched.img.
STEP 7: Boot Spreadtrum Device to Fastboot
To flash this Magisk patched boot.img file and hence root your Spreadtrum device, you will have to boot your device to the Fastboot Mode. Here’s how it could be done:
- To begin with, connect your device to the PC via USB cable. Make sure USB Debugging is enabled.
- Then head over to the platform-tools folder, type in CMD in the address bar, and hit Enter. This will launch the Command Prompt.
- Type in the following command in the CMD window to boot your device to Fastboot Mode
adb reboot bootloader

STEP 8: Root Spreadtrum device via Magisk patched boot.img
- Start off by transferring the magisk_patched boot.img file to the platform-tools folder on your PC.
- Now check if your device is a single-A partition or dual A/B partition. You may refer to our guide for the same: How to Check and Change Current Active Slot on Android.
- If your device is a single A-only partition, then use the below command to flash the patched boot file:
fastboot flash boot patched_boot.img
- On the other hand, if your device is A/B, then execute the below two commands to flash the patched boot file to both the slots:
fastboot flash boot_a patched_boot.img
fastboot flash boot_b patched_boot.img
- Once that is done, you may now reboot your device to the OS via the following command
fastboot reboot
With this, you have successfully carried out the steps to root your Spreadtrum device via Magisk patched boot.img file. If you have any queries concerning the aforementioned steps, do let us know in the comments. We will get back to you with a solution at the earliest.


Puji
Hi Sadique,
Very good tutorial..i have follow your guidance but i got problem to unlock bootloader. I already try all type of command in fastboot but zero result. My phone still lock bootloader.
My phone is spreadtrum phone with local Brand “Evercoss” M55b (Xtream 2 Pro) .
Could you give another advice for solve this problem.
Thank in advance