In this guide, we will show you numerous methods to delete the cache files on your Android device. Cache are temporary data belonging to various apps, services, and other OS elements and are stored on your device’s dedicated cache partition. Your device uses these data to speed up your usage experience as it would no longer have to load a particular app from scratch. Rather, it would pick up from the last stored point from the cache memory, thereby saving considerable time and hence lowering down the bootup process of that app as well.
However. sometimes these data might get corrupted which in turn could result in negative consequences on the entire app ecosystem. Along the same lines, if a lot of temporary data gets accumulated over the due course of time, then it could slow down the associated app. This is the reason why it is always recommended to delete these data at regular intervals. And in this guide, we will show you how to do just that, via five different methods. So without further ado, let’s get started with the steps to delete the cache files on Android devices.
Table of Contents
How to Delete Cache in Android via ADB, Fastboot, Recovery
The five different methods discussed here are: via the Settings menu, using ADB Commands, via Fastboot Commands, from Stock Recovery, and using a custom recovery like TWRP. We have discussed the best-case scenario for each of these methods under their respective sections. So go through them and then decide which one is in sync with your requirement.
METHOD 1: Delete Cache from Settings
This method is best suited when you are planning to delete the cache of a few apps. And is usually recommended when the app isn’t performing along the expected lines. So with that in mind, follow the below steps to delete cache on your Android device via the Settings menu.
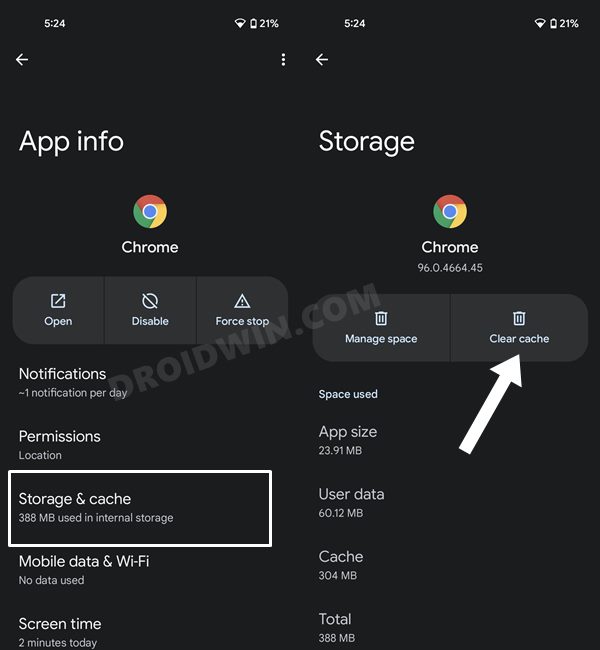
- To begin with, head over to the Settings menu on your device.
- Then go to Apps > See All Apps and select the desired app from the list.
- Now go to its Storage and Cache section and tap on Clear Cache.

- That’s it. The temporary data of that app stands deleted.
- You may now carry out these steps across all the other apps whose cache data you wish to delete.
METHOD 2: Delete Cache via Stock Recovery
If you want to delete the cache data for numerous apps, then manually carrying out that task for each of those apps would take ages. Likewise, if you are planning to delete the cached data for the system process, then you wouldn’t be able to do so from the Settings menu.
In both these cases, you will have to take the help of the stock recovery to delete the cache files from your Android device. In this regard, different devices have different key combinations when it comes to booting the device to stock recovery. Therefore, to avoid any confusion, we will instead be listing out the universal ADB method that is applicable across all the devices. Follow along.
- To begin with, download the Android SDK Platform Tools on your PC.
- Then extract it to any convenient location and it shall give you the platform-tools folder.
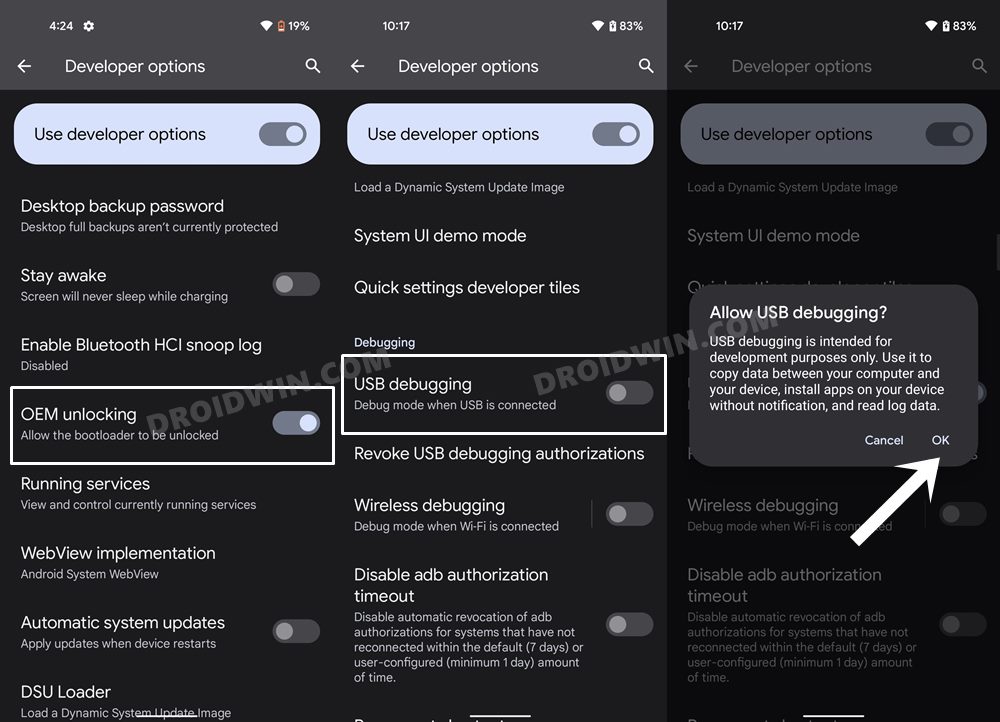
- After that, pick up your device and head over to Settings > System and tap on Build Number 7 times. It shall enable Developer Options.
- So go to Settings > System > Developer Options and enable the toggle next to USB Debugging.
- Now connect your device to the PC via a USB cable.
- Then head over to the platform-tools folder, type in CMD in the address bar, and hit Enter. This will launch the Command Prompt.
- Now type in the following command in the CMD window to boot your device to Recovery Mode
adb reboot recovery
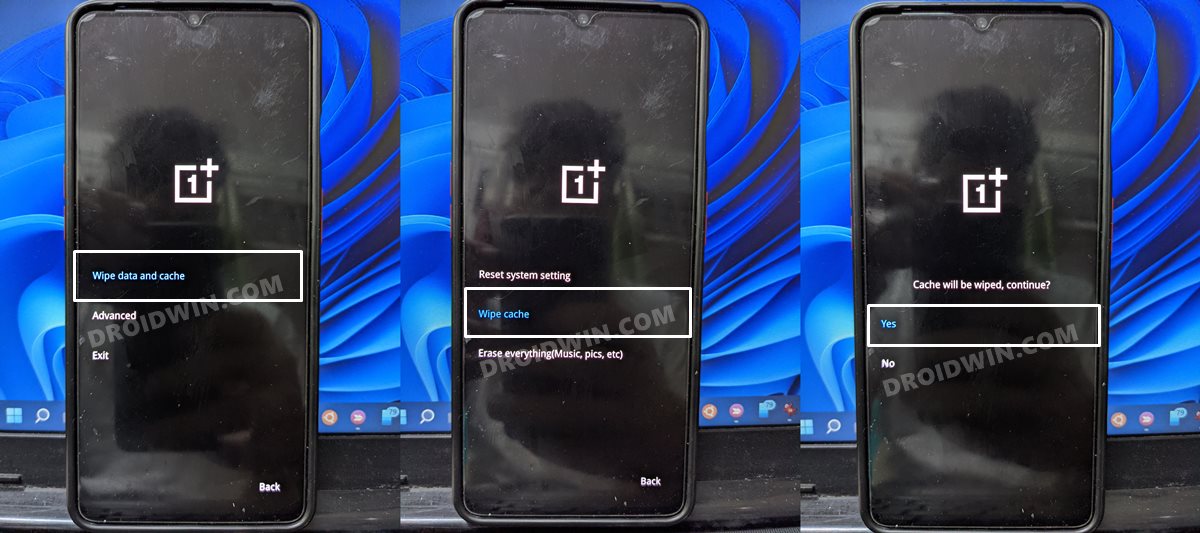
- Use the Volume keys to highlight the Delete Cache option and press the Power key to confirm it.
- Once done, you may now reboot the device to the OS.


METHOD 3: Delete Cache via TWRP
If you are dealing with custom binaries, ROMs, and firmware, then you might be having a custom recovery like TWRP installed as well. So let’s use that custom recovery to delete the cache files from your Android device.
- To begin with, download the Android SDK Platform Tools on your PC.
- Then extract it to any convenient location and it shall give you the platform-tools folder.
- After that, enable USB Debugging on your device, as mentioned in the previous section.
- Now connect your device to the PC via a USB cable.
- Then head over to the platform-tools folder, type in CMD in the address bar, and hit Enter. This will launch the Command Prompt.
- Now type in the following command in the CMD window to boot your device to TWRP
adb reboot recovery
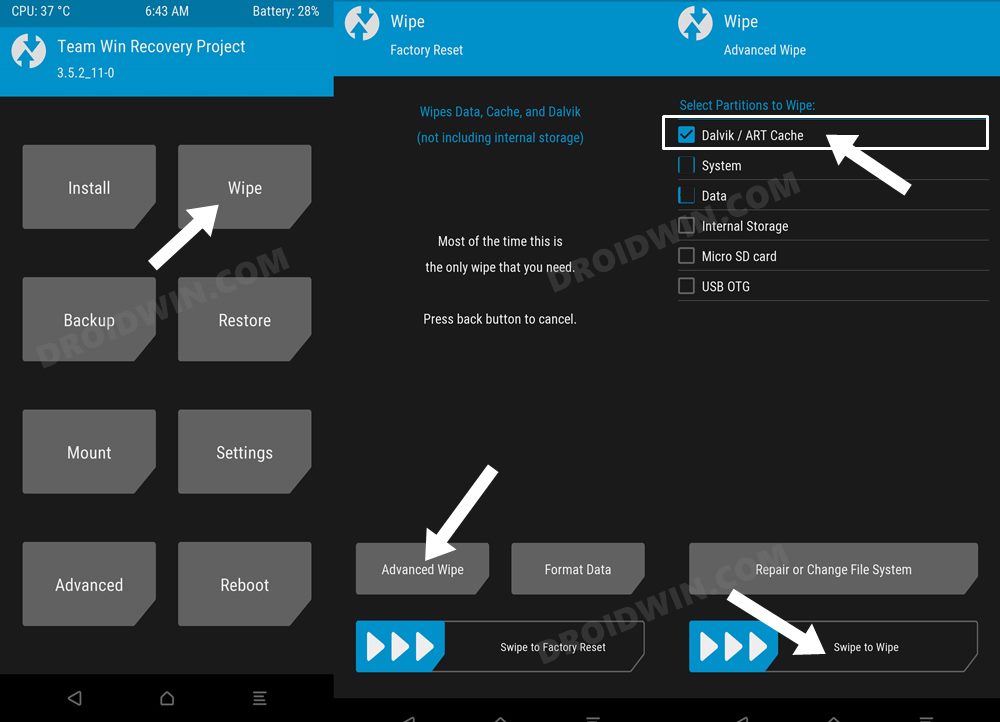
- Now go to the Wipe section and select Advanced Wipe.
- After that, select Dalvik/ART Cache and perform a right swipe to wipe it. This will wipe the cache partition on your device.
- Once done, go to Reboot and select System to boot your device to the OS.

METHOD 4: Delete Cache via ADB Command
For this process to work, you will need to have administrative-level privileges, in other words, your device should be rooted. If that’s well and good, then proceed ahead with the below steps. However, if your device isn’t rooted, then just doing so for the sake of deleting cache might not be the most feasible approach as rooting might void the warranty and would lead to factory reset.
(Actually, unlocking the bootloader results in both these consequences and not rooting. But since unlocking the bootloader is the first step for rooting, your device will have to suffer both these consequences one way or the other). Therefore, it’s better to avoid these issues and you should instead opt for the first three methods that we have listed above in order to delete cache from your Android device.
- Download the Android SDK Platform Tools and extract it to any convenient location It shall give you the platform-tools folder.
- After that, enable USB Debugging on your device and then connect your device to the PC via a USB cable.
- Then head over to the platform-tools folder, type in CMD in the address bar, and hit Enter. This will launch the Command Prompt.
- Now type in the following command in the CMD window and hit Enter:
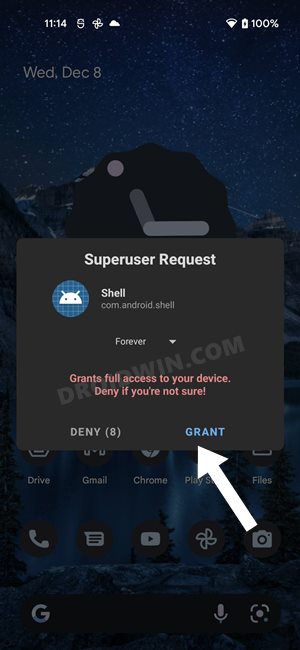
su
- It would bring up the Magisk Prompt on your device, make sure to tap Grant.
- Once that is done, execute the below two commands, one after the other, to delete the data of the cached partition:
rm - r /data/dalvik-cache
rm - r /cache/dalvik-cache
- That’s it. The process stands complete.
METHOD 5: Delete Cache via Fastboot Commands
While this method of deleting cached doesn’t require system-level access or root, but its efficiency rate is somewhat debatable. While it spelled out success for some of the users, for others, it lead to access denied error. Well, if you are a tech enthusiast and are willing to take the risk, then let’s get started:
- Download the Android SDK Platform Tools and extract it to any convenient location It shall give you the platform-tools folder.
- After that, enable USB Debugging on your device and connect it to the PC via a USB cable.
- Then head over to the platform-tools folder, type in CMD in the address bar, and hit Enter. This will launch the Command Prompt.
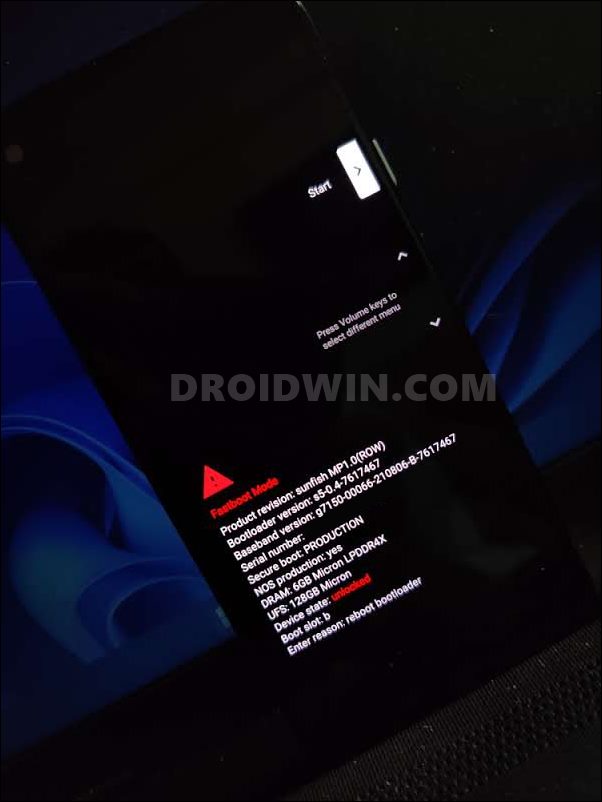
- Now type in the following command in the CMD window to boot your device to Fastboot Mode
adb reboot bootloader
- After that, execute the below command to delete the cache data from your device:
fastboot erase cache
- That’s it. You may now reboot the device to the OS via the below command:
fastboot reboot

So with this, we round off the guide on how you could delete cache from your Android device. We have listed five different methods for the same, spread across varied domains. If you have any queries concerning the aforementioned steps, do let us know in the comments. We will get back to you with a solution at the earliest.


ThanosAthaYT
Will “fastboot erase cache” lose my files?