In this guide, we will show you various methods to boot your Windows 11 PC to the Recovery Environment. We will be listing out the instructions for both cases- when your PC is able to access the OS and when it cannot boot to the OS. The Windows Recovery page beholds quite a few nifty features, and most of them are used to diagnose and rectify OS issues. For example, you could fix the startup-related issues, reset or refresh your PC, change BIOS settings, use a bootable USB to install OS, and carry out a plethora of tasks in the same domain.
Since it is used to rectify OS-related issues, it is stored in a separate partition, away from the operating system, so that even if the OS gets bugged with any error, the recovery environment remains safe and secure. However, this then also means that you would need a different route to access this menu. So if you are yet to set your feet in this road less traveled, then fret not. In this guide, we will make you aware of numerous methods to boot your Windows 11 PC to the Recovery Environment. Without any further ado, let’s get started.
Table of Contents
What are the Options in Windows 11 Recovery Environment?
As soon as your PC boots to the Windows Recovery Environment, you will be able to get hold of the following features, all of which are self-explanatory.
Recovery Environment Options in Windows 11
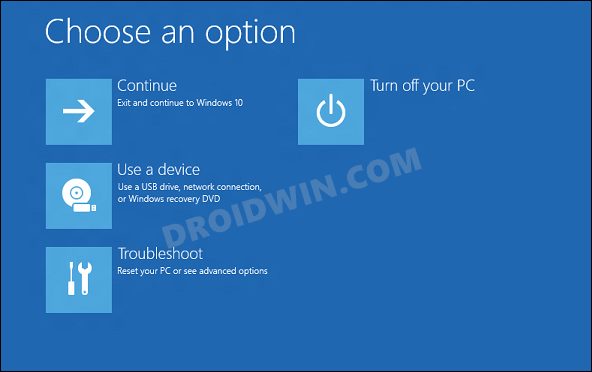
- Continue to boot to Windows 11
- Use a Device: Use a USB Device, Network Connection, or Windows Recovery DVD
- Troubleshoot: Refresh PC, Reset PC, Advanced Options
- Turn off your PC
Most of the users are generally interested in the Troubleshoot page, as this is where most of the goodies are present. So once you reach Troubleshoot, the following features will be waiting for you:
Troubleshoot Options in Windows 11
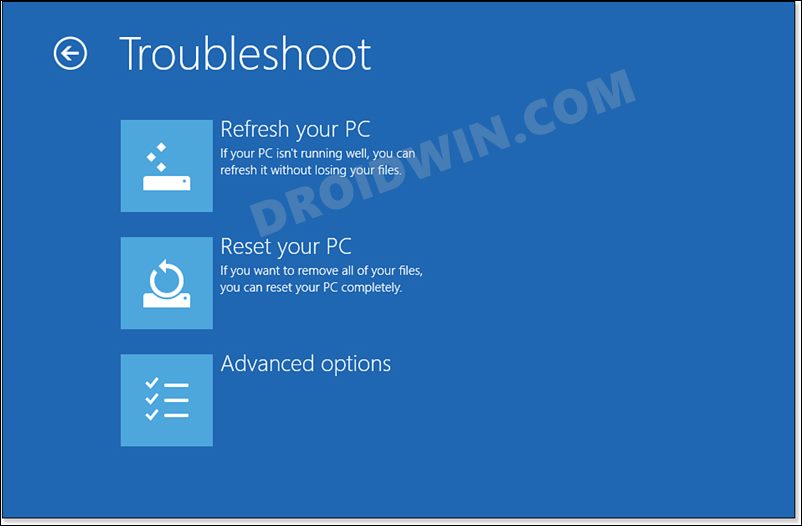
- Refresh: Refresh PC without losing files
- Reset PC: Format PC
- Advanced Options: Startup Repair, Startup Settings, Command Prompt, Uninstall Updates, UEFI Firmware Settings, System Restore
Again there are no brownie points in guessing why the Advanced Options hold such a high rank among the enthusiast. Here’s a short explanation of the features that this Advanced Options have in its arsenal:
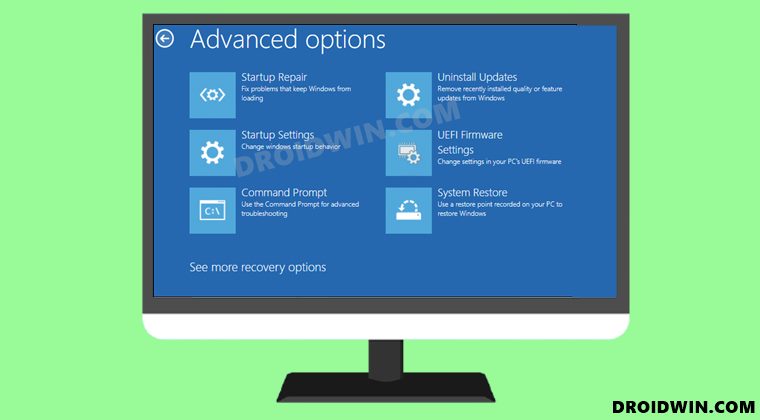
Advanced Options in Windows 11
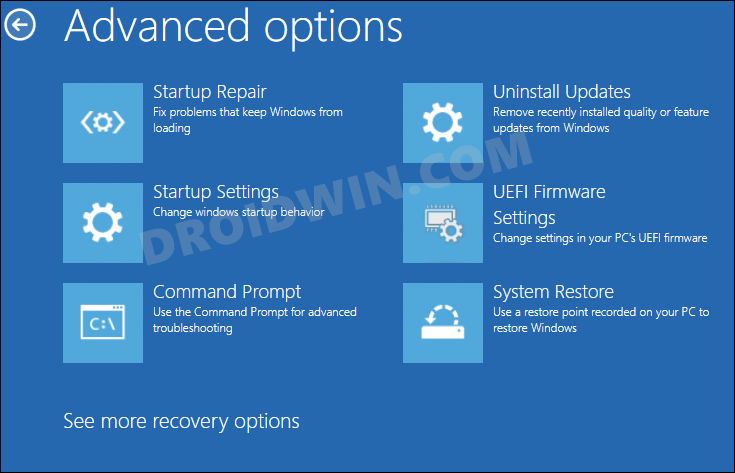
- Startup Repair: Use this to rectify issues when your PC is not booting up
- Startup Settings: use these settings to change Startup settings
- Command Prompt: use this CMD window to execute commands to disable or uninstall programs or drivers that are preventing you from booting your PC to the OS.
- Uninstall Updates: remove recently installed updates (that might prevent your PC from booting up)
- UEFI Firmware Settings: Change UEFI and BIOS settings
- System Restore: Restore PC to an earlier build (if you have created a restore point)
With this, you would have got a decent idea regarding all the feature sets of this menu. Let’s now check out the steps to boot your Windows 11 PC to this Recovery Environment. We have listed the methods for both the scenarios- when your PC is able to boot to the OS and when it isn’t. You may directly refer to the one that is in sync with your requirement.
Boot into Windows 11 Recovery Environment: When PC Boots to the OS
Here are the various methods through which you could access the recovery menu. Do note that all the methods that we have shared in the second section (when your PC cannot boot to the OS) could also be easily used here as well. Just to avoid redundancy, we haven’t repeated them in this section.
Using the Shift+Restart Shortcut
- Head over to the Start Menu and click on the Power button.
- Then press and hold the Shift Key and while doing so, click Restart.
- Your PC shall now boot to Windows 11 Recovery Environment.
From the Settings Menu
- Use the Windows+I shortcut keys to access the Settings menu.
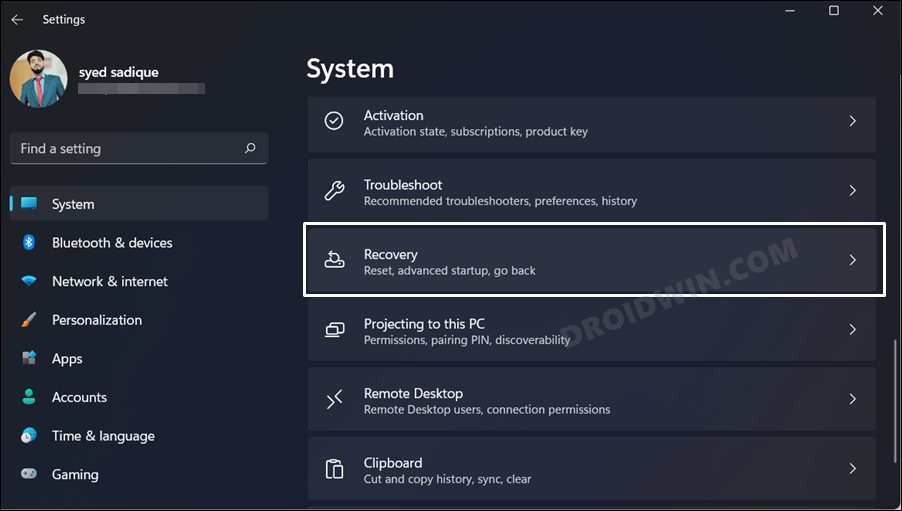
- Then select System from the left menu bar and go to Recovery.

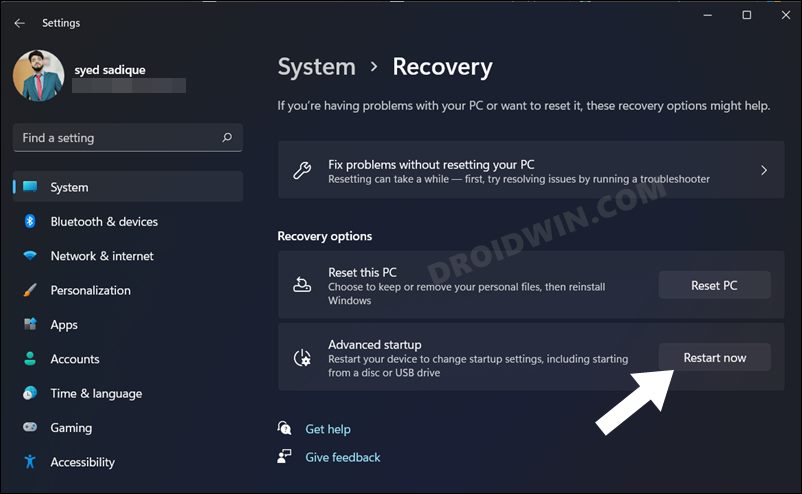
- Within that, click on the Restart Now button next to the Advanced startup.
- Your PC will now boot to the Windows 11 Recovery Environment.
Via Command Prompt
- Head over to the Start Menu, search Command Prompt, and launch it as an administrator.
- Now just copy-paste the below command to boot your PC to Windows 11 Recovery Environment:
shutdown /f /r /o /t 0
- Or you may also execute the below command to do the same:
reagentc /boottore

Via Bootable USB Device
- First off, you will have to create a bootable USB device with a Windows ISO file inside it. For that, you may use the Windows 11 Installation Assistant.
- Just download it and proceed with the on-screen instructions to create a bootable USB. Keep in mind that the USB device should at least have 8GB free space and it would also be wiped during the process, so take a backup beforehand.
- Now boot your PC via this USB device and it shall bring up the Windows 11 installation. Proceed with the on-screen instruction and you should see the Repair your computer option present at the bottom. Click on it and will take you to the Windows 11 Recovery Environment.

Boot into Windows 11 Recovery Environment: When PC Cannot Boot to the OS
Here are the numerous ways to boot your PC to the recovery screen when it isn’t able to access the operating system.
Using the Function Keys
When your PC is starting up, continuously press the F11 key and you should be taken to the Windows 11 Recovery Environment. On some PCs, you might have to press the F9 or F12 key.
Using a Bootable USB
- For this to work, you will need to have a bootable USB device with the Windows 11 ISO file in it. If you already have it with you, well and good. Otherwise, take someone’s else PC and create a bootable USB device via the Windows 11 Installation Assistant.
- Just download that app and proceed with the on-screen instructions to create a bootable USB. Keep in mind that the USB device should at least have 8GB free space and it would also be wiped during the process, so take a backup beforehand.
- Now boot your PC via this USB device and it shall bring up the Windows 11 installation. Proceed with the on-screen instruction and you should see the Repair your computer option present at the bottom. Click on it and will take you to the Windows 11 Recovery Environment.
Using Force Reboot
In this method, you will have to reboot your PC via the Power key but do not let it reach the stage where it tries to access the OS. As soon as it is about to boot to the OS, again long-press the Power key to restart your PC. Do this three consecutive times.
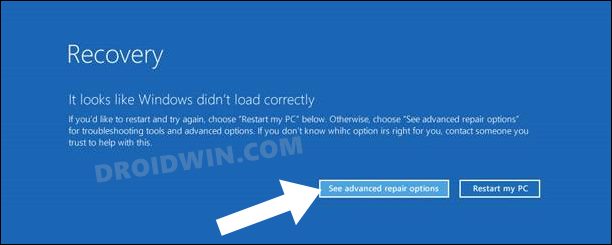
After that, the system will display the message that “It looks like Windows didn’t load correctly”. At the bottom, will be the “See advanced repair options”, click on it and you should be taken to the Windows 11 Recovery Environment.
So with this, we round off the guide on how you could boot your PC to Windows 11 Recovery Environment. We have listed out the steps for both the cases, when you are able to boot to the OS and when you aren’t. If you have any queries concerning the aforementioned steps, do let us know in the comments. We will get back to you with a solution at the earliest.


