In this guide, we will show you the steps to download and install Android 12 GSI on any Project Treble Devices. Well, that was quick! While some devices are yet to get a taste of Android 11, the twelfth iteration is already up and running. Google has just released the first developer preview for its Pixel series of devices. And with that, there are a plethora of noteworthy features that you could welcome onto your device right away.
However as is evident from its name, most features at this stage are developer-related. So there wouldn’t be major UI/UX changes or an interesting addition to your devices. Rather optimizations, improvements, and tons of under the hood changes are on the cards, as of now. These include the likes of better user experience tools, improved Trust and safety, app compatibility among others.
If you wish to get aware of all these features, then this Android Developers Blog is a must-read. With that said, the Android 12 image is live for Pixel 3 and onwards. But what if you don’t own a Pixel handset? Well, GSI is there to the rescue! From this post, you could download and install the latest Android 12 GSI Image on your Project Treble devices. So without further ado, let’s get started.
Table of Contents
Android 12 GSI Collections
UPDATE 1: Android 12 Beta GSI is now live. You could now directly download and install from this post. Refer to the below Download section for more.
EfranGSI is among the most popular developers when it comes to developing these GSI. However, it might take some time before his builds are up and running. Along the same lines, Google hasn’t officially hosted the Android 12 GSI. But there’s an unofficial GSI Porting Project based on Erfan which goes by the name Nippon GSI.
And as of now, we will be using that only, until other builds become available. Furthermore, these builds are currently based on First Developer Preview, so there would be bugs and issues. Hence you shouldn’t try this on your primary device or use it as a daily driver.
Download Android Beta 12 GSI from Google
First of all, check your device’s CPU Architecture. For that you may refer to our detailed guide: ARM, ARMx64, x86: What processor does my Android Device have? Or, use the below ADB Command. Then check the result and download the file accordingly from the below table.
adb shell getprop ro.product.cpu.abi
| Architecture | Download |
|---|---|
| x86+GMS | LINK |
| ARM64+GMS | LINK |
| x86_64 | LINK |
| ARM64 | LINK |
Download Android 12 Beta GSI
From this section, you could get hold of all the Android 12 Beta GSI files.
Download Android 12 Beta 3 GSI
Download Android 12 Beta 2.1 GSI
Download Android 12 Beta 2 GSI
Download Android 12 Beta 1 GSI
Download Nippon Android 12 GSI
We will be updating more GSI ROMs as and when it gets available. Credits: Nippon GSI Updates [Telegram]
AOSP Generic
Android Version: 12
Brand: Android
Model: mainline
Codename: generic
Security Patch: 2021-02-05
Fingerprint: Android/aosp_arm64/generic_arm64:S/AOSP.MASTER/7155427:userdebug/test-keys
Raw Image Size: 2.11 GiB
Download: Link
Pixel 4a 5G
Android Version: 12
Brand: google
Model: mainline
Codename: generic
Security Patch: 2021-02-05
Fingerprint: google/bramble/bramble:S/SPP1.210122.020.A3/7145137:user/release-keys
Raw Image Size: 2.40 GiB
Download: Link
Pixel 3
Android Version: 12
Brand: google
Model: mainline
Codename: generic
Security Patch: 2021-02-05
Fingerprint: google/blueline/blueline:S/SPP1.210122.020.A3/7145137:user/release-keys
Raw Image Size: 2.44 GiB
Download: Link
Pixel 5
Android Version: 12
Brand: google
Model: mainline
Codename: generic
Security Patch: 2021-02-05
Fingerprint: google/redfin/redfin:S/SPP1.210122.020.A3/7145137:user/release-keys
Raw Image Size: 2.45 GiB
Download: Link
Download Google Android 12 GSI
- GSI Releases [yet to be released]
Download Erfan Android 12 GSI
- EfranGSI Telegram Group [yet to be released]
How to Install Android 12 GSI on Project Treble Devices
There exist two different methods to install the Android 12 GSI onto the Project Treble device. The first one is via TWRP Recovery whereas the second method is via Fastboot Commands. It is recommended that you give preference to the TWRP Recovery [STEP 4A]. However, if that’s not available then try out the Fastboot Method [STEP 4B]. Droidwin and its members wouldn’t be held responsible in case of a thermonuclear war, your alarm doesn’t wake you up, or if anything happens to your device and data by performing the below steps.
STEP 1: Check For Project Treble Compatibility
First and foremost, you will have to check if your device is treble compatible or not. A general rule of thumb is every device that came with Android 8.0 Oreo out of the box supports Project Treble. However, let’s still be double sure. So head over to the Play Store and download the Treble Check app.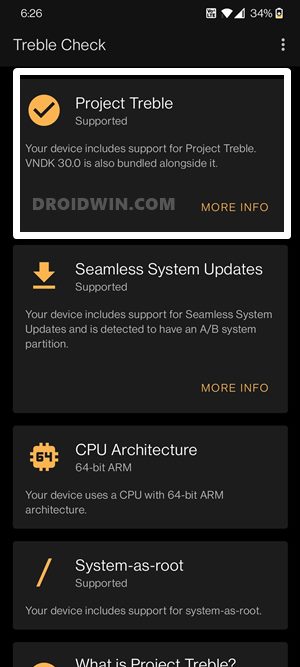
Now launch the app and the result will be right in front of you. If you see a tick mark next to Project Treble along with the text that “Your device includes support for Project Treble…..” then you can proceed ahead with the steps to download and install the latest Android 12 GSI Image on your device.
STEP 2: Unlock Bootloader
Your device also needs to have an unlocked bootloader. If that is not the case, then you may refer to our following guides:
- How to Unlock Bootloader on any Samsung Device [New VaultKeeper Method]
- A Universal Guide to Unlock Bootloader on any Realme Device
- How to Unlock Bootloader on any Motorola Device
- How to Unlock Bootloader on Google Pixel Device
Do keep in mind that unlocking the bootloader will wipe off all the data from your device and make its warranty null and void. With that said, once the bootloader is unlocked, move over to the next step to install the latest Android 12 GSI Image on your Project Treble devices.
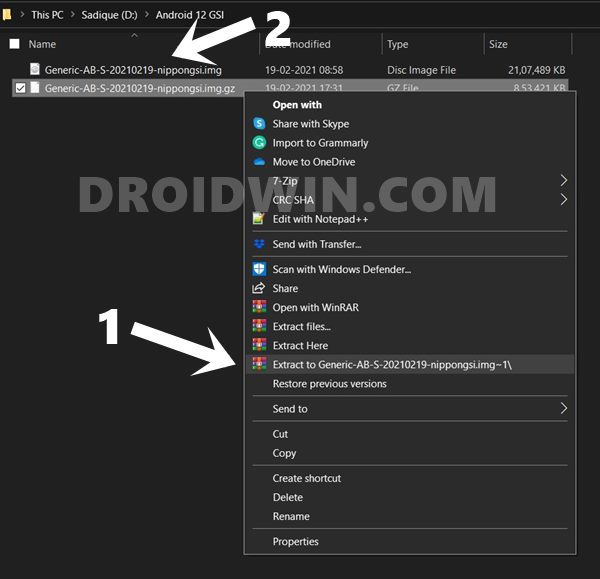
STEP 3: Extract Android 12 GSI IMG
The ROM that you would have downloaded might be in xxx.img.gz. You will have to extract it via WinRAR to get its IMG file. So right-click on it and select Extract to GSI.img. You shall now get the IMG file. Rename it as system, hence the complete name becomes system.img.
STEP 4A: Install Android 12 GSI via TWRP Recovery
- First and foremost, you will need to have the TWRP Recovery installed. If you haven’t done so yet, then refer to our comprehensive guide to How to Install TWRP Recovery on Android.
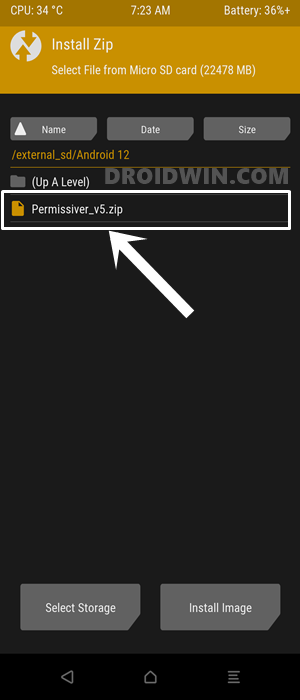
- Then download the Permissiver_v5.zip and transfer it to your device. This file is needed to change your kernel from Enforcing to Permissive.
- Likewise, transfer the downloaded Android 12 GSI system.img file to your device as well. It’s better to move both these files to SD Card or USB OTG if you have one.
- Now boot your device to TWRP Recovery using hardware key combinations or via the adb reboot recovery command.
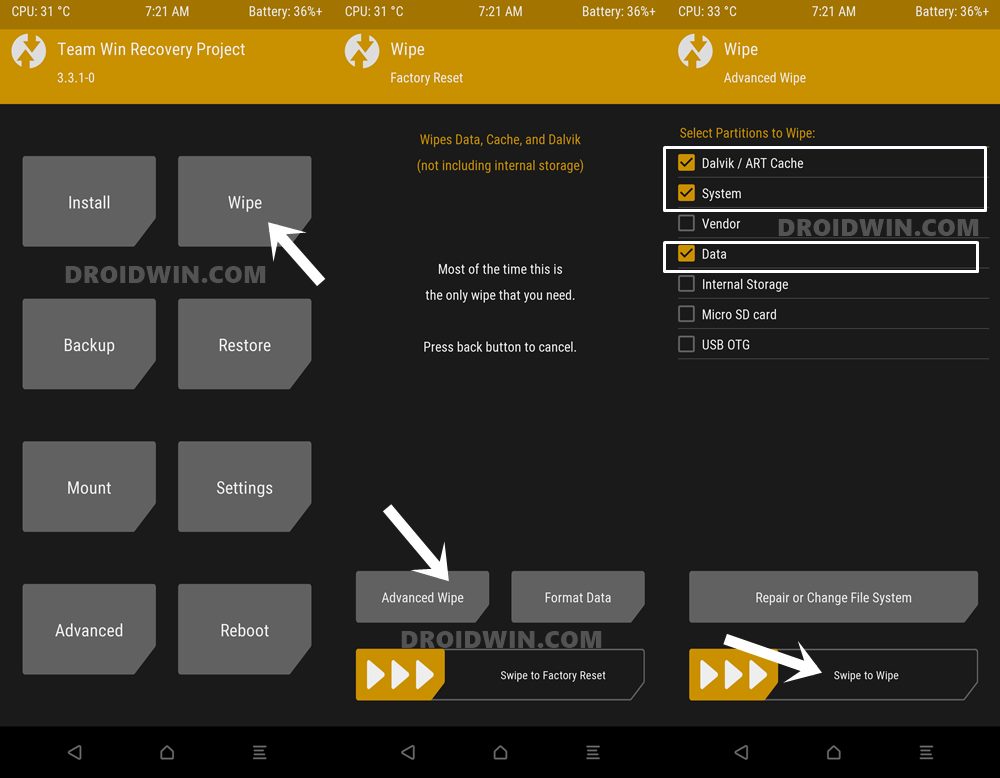
- Go to the Wipe section and tap on Advanced Wipe. Select the Dalvik, System, and Data partition and perform a right swipe to wipe them.

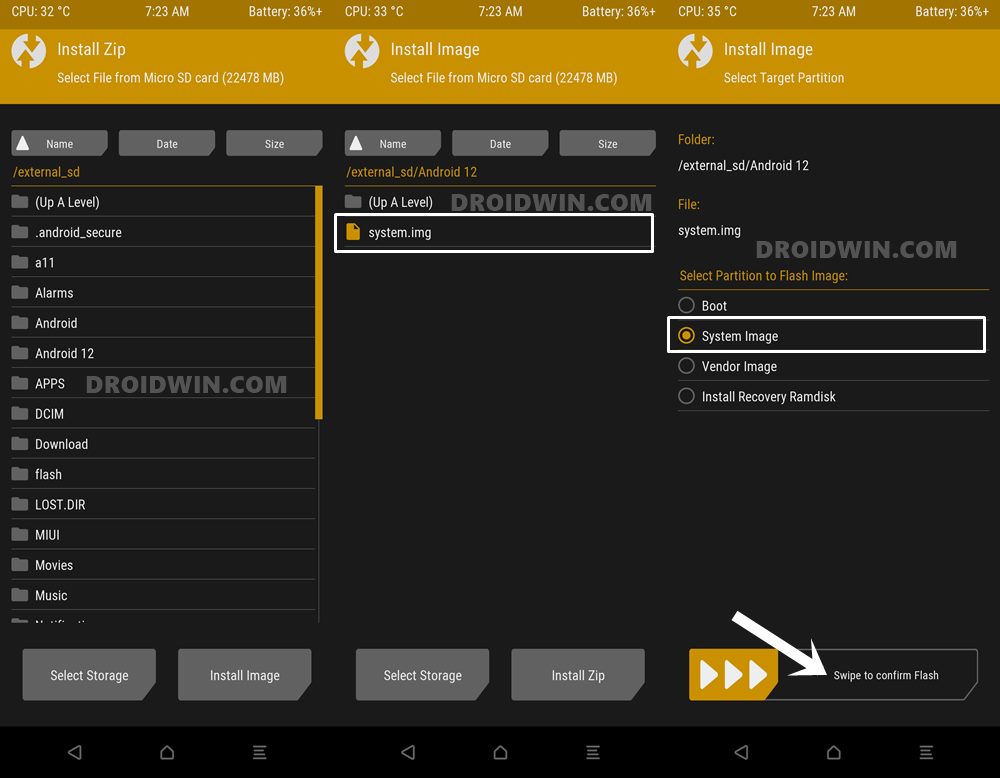
- Once done, go back to the main menu of TWRP. Then head over to Install and tap on the Install Image button situated at the bottom right.
- Now select the system.img file, select the System Image partition from the list and perform a right swipe to flash this file. [If you haven’t yet sent the file to your device, then you may refer to this guide: Three Methods To Transfer or Install Files via TWRP Recovery].
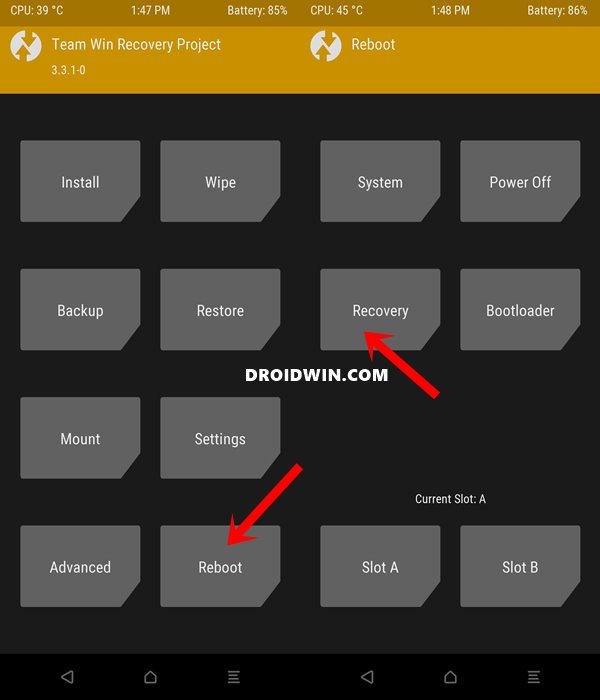
- When that is done, go to Reboot and tap on Recovery. Your device will reboot to TWRP Recovery.
- Now go to Install, select the Permissiver_v5.zip file and perform a right swipe to flash it.
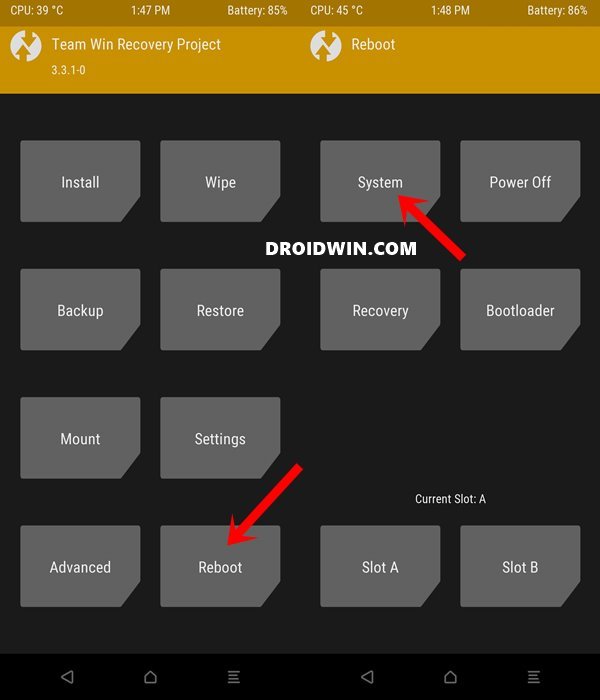
- When that is done, you may now reboot your device to the newly installed OS. For that, go to Reboot and select System.
That’s it. These were the steps to download and install Android 12 GSI on any Project Treble Devices using TWRP Recovery. Let’s now check out how this could be done via Fastboot Commands.
STEP 4B: Install Android 12 GSI via Fastboot Commands
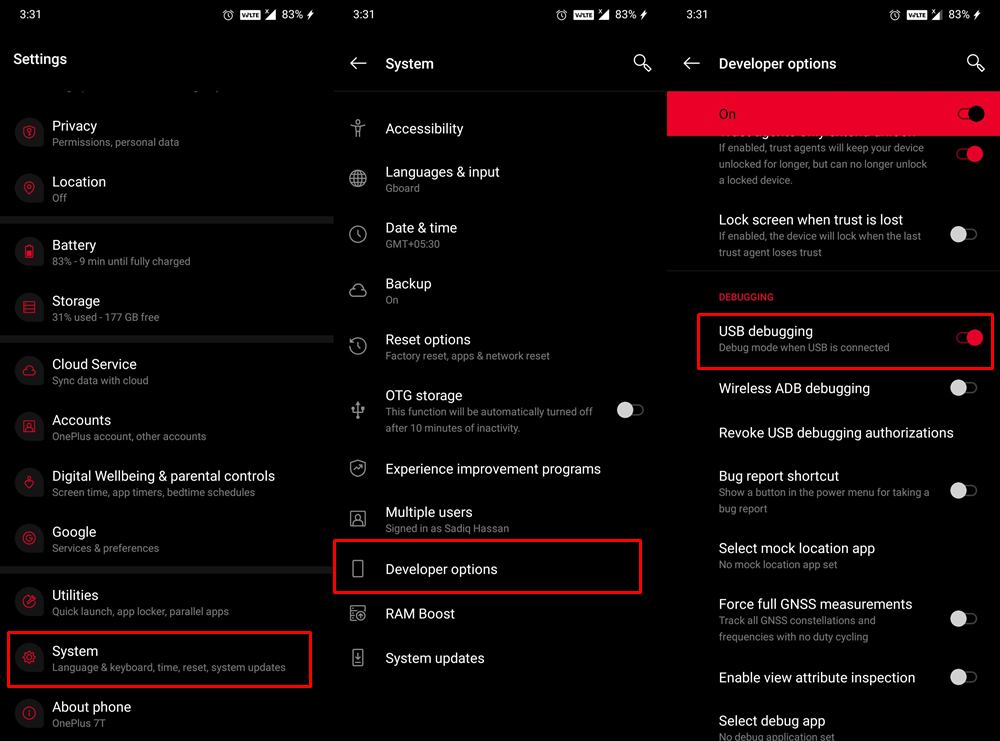
- To begin with, enable USB Debugging onto your device. This will make your device recognizable by your PC in ADB mode. So head over to Settings > About Phone > Tap on Build Number 7 times > Go back to Settings > System > Advanced > Developer Options > Enable USB Debugging.
- Next up, download and install Android SDK Platform Tools. This is the official ADB Fastboot binaries provided by Google.
- Also, transfer the Android 12 GSI file to this platform-tools folder.
- Then connect your device to the PC via USB cable. Make sure USB Debugging is enabled.
- Head over to the platform-tools folder, type in CMD in the address bar, and hit Enter. This will launch the Command Prompt.
- Now ype in the following command in the CMD window to boot your device to Fastboot Mode
adb reboot bootloader
- [Only for OnePlus] If you are having a OnePlus device, then you would first have to flash the stock boot.img file onto your device. For that, please refer to our guide to Extract Stock Boot.img from OnePlus OxygenOS Stock ROM. Once you gave extracted it, place the file inside the platform-tools folder on your PC. Then launch the CMD window inside that directory and execute the below two commands to flash the boot.img to both the slots:
fastboot flash boot_a boot.img
fastboot flash boot_b boot.img
- Most GSI Image, including the one from Google, requires you to disable the Android Verified Boot (AVB). So extract the vbmeta.img file from the downloaded GSI ROM and then place this file inside the platform-tools folder. Then execute the below command in the CMD window to flash this vbmeta file:
fastboot flash vbmeta vbmeta.img
- If the above command gives out any error, then you may also try this command to disable DM verity:
fastboot --disable-verity -disable-verification flash vbmeta vbmeta.img
- After that, type in the below command to wipe the system partition:
fastboot erase system
- You may now use the below command to flash the Android 12 GSI file to the system partition
fastboot flash system system.img
- If the above command didn’t work out for you, then here’s an alternate command to flash the system.img file:
fastboot -u flash system system.img
- After this, you will have to wipe the data partition using the following command
fastboot -w
- When that is done, you may reboot the device to the OS via the following command
fastboot reboot
- Your device will now boot to the newly installed OS.

With this, we conclude the guide on how to download and install Android 12 GSI on any Project Treble Devices. We will be regularly updating this guide with more GSI files as and when they become available. If you have any queries concerning the aforementioned steps, do let us know in the comments. We will get back to you with a solution at the earliest.
FAQ: How to Install Android 12 GSI without Fastboot Commands
You could also let Google download and install the appropriate GSI ROM onto your device. You wouldn’t have to use any ADB or Fastboot Commands and the entire process requires just two clicks at the very most! To try it out, then please check out this interesting guide: Install GSI on Android via DSU Loader (Without Fastboot Commands).
Android 12 GSI Troubleshooting
If you have got stuck in between and are not able to boot your device to the OS, then you may refer to the below-linked guides to bring back your device to normal working conditions.


krishnakarthik
my device is stuck on boot loop after using ur steps what o do
Dillip Kumar Panda
hi,
I have gone thoroughly through the post and installed android 12 beta 4 gsi in my MiA3 But unfortunately my phone is only booting with a new android logo (may be of android 12 image) and stuck there. Tried several times even made the mistake of choosing the both slots in same system image. Now the phone is in stuck mode of “android booting logo”.
Please help me out.
I have downloaded the “gsi_gms_arm64-exp-SPB4.210715.012-7615752-b0deaa5e” from google for my MiA3.
Waiting for your response..
Thank you
Abhinav
I didn’t understand What is the meaning of the device name in GSI released by Nippon like Pixel 3, Pixel 4a 5G, Pixel 5 and What is AOSP Generic. Please tell me exactly which version is suitable for Pixel 2 XL?
Sadique Hassan
Hi Abhinav, as of now, AOSP seems to be the best route forward for your device.